Dunkel-Osteus

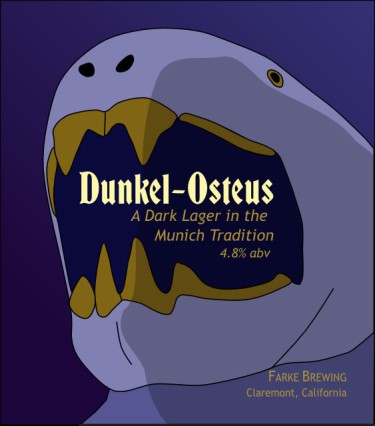
labelI love brewing new styles, and I also love a bad beer pun. The unholy marriage between the two: Dunkel-Osteus!

For this batch, I’m making a Munich dunkel. It’s a reasonably dark, malt-forward lager, in a style that I’ve not brewed previously. Musing over what to call this batch, I remembered a famous prehistoric fish, Dunkleosteus. Dunkel-Osteus was a match made in prehistoric pun heaven!

Dunkleosteus lived around 375 million years ago, during the Devonian (also known as “The Age of Fishes”). It was a giant animal, with sharp bony plates lining its jaws rather than teeth. The largest species were huge, clocking in at around 20 feet in length and a ton in body mass. These were top-tier marine predators, and are a popular exhibit in many museums today. Dunkleosteus and its close kin were an early side branch in vertebrate evolution–nothing exactly like them is around today. However, we humans inherited a common feature from the way-way-way-back ancestor we share with Dunkleosteus: our jaw bones! The open-and-shut jaw arrangement and the major bones that make up our mouth had their origins in some humble fish back before even Dunkleosteus (see this scientific paper on the evolutionary relationships of these organisms). Although the extent to which the jaws of Dunkleosteus and its kin are directly tied to our own has been debated, the latest evidence strongly suggests that they have the same essential bones and are based on the same genetic blueprints, with some evolutionary tweaks. So, next time you open wide for a tasty lager, think about how amazing it is that you are using some of the same skull bones that Dunkleosteus had!

Evolutionary Tree

A highly pruned evolutionary tree for jawed fish and kin. Everything is approximately to scale. Silhouettes via phylopic.org. Humans by Mike Keesey (public domain, right figure) and Sarah Werning (CC-BY, left figure), elephant by Mike Keesey (public domain), tyrannosaur by Emily Willoughby (CC-BY-SA), Dunkleosteus by Dmitry Bogdanov and converted to silhouette by Mike Keesey (CC-BY), tuna by Stuart Humphries (public domain).

The fossil fish Dunkleosteus was named in honor of David Dunkle, a paleontologist at the Cleveland Museum of Natural History way back in the 1950s. As such, the prehistoric organism has nothing to do with the Munich Dunkel style (and indeed, Dunkle and Dunkel are spelled differently). Nonetheless, I couldn’t pass up a good pun!

The recipe is modified slightly from a dunkel presented in Modern Homebrew Recipes, by Gordon Strong. I love the simplicity of Strong’s version–a base malt, two specialty malts, one variety of hops, and a yeast. I elected to use a single infusion mash rather than a decoction mash schedule, and upped the gravity a point or two (while still keeping it at the lower end of the style). I also replaced German Tettnang hops with American-grown Liberty, based on availability, and used dry yeast for simplicity. One major recommendations I retained from Strong’s book was to add the dark grains at vorlauf (in this case, the Carafa Special II), rather than leaving them in the mash for the whole duration. My goal was to have the Carafa just be for coloration, rather than for adding much flavor, and a short steep seemed like the best way to achieve this.

Dunkel-Osteus

  • 9 lbs. Munich II malt (Weyermann)
  • 5 oz. melanoidin malt (Weyermann)
  • 6 oz. Carafa Special II malt (Weyermann), added at vorlauf
  • 1.5 oz. Liberty hops (3.9% alpha), 60 minute boil
  • 1 tsp. Fermax yeast nutrient, 10 minute boil
  • 1 Whirlfloc tablet, 10 minute boil
  • 2 pkg. Saflager Lager yeast (Fermentis W34/70)

Target Parameters

  • 60 minute infusion mash, 154°
  • 1.050 o.g., 1.013 f.g., 4.9% abv, 22 IBU, 20 SRM

Procedure

  • I adjusted my water slightly, to fall within the “malty dark lager” profile in the Palmer and Kaminski water book. I used 5 gallons of Claremont tap water with 3 gallons of RO water and 5 g of calcium chloride. The resulting water profile should approximate 82 ppm Ca, 7 ppm Mg, 15 ppm Na, 31 ppm SO4, 94 ppm Cl, 131 ppm HCO3, and residual alkalinity of 44 ppm.
  • I added 3.25 gallons of water to my mash tun (1 gallon of RO, 2.25 gallons of tap water, and 5 g calcium chloride), at a temperature of 172° or so. I swirled it around the mash tun for a bit, and let it cool down over a period of 5 minutes or so until it hit a temperature of 166°. I mashed in at this point, to hit a temperature of 154.5°.
  • The mash cooled to around 150° after 50 minutes.
  • After 60 minutes in the mash, I added 1.5 gallons of sparge water, let it sit for 10 minutes, added the dark grains, and vorlaufed before collecting the first runnings. My sparge water was made of a blend of 2 gallons RO water and the remainder with tap water. I added ~3.25 gallons of water for the second batch sparge, stirred, let it sit for 10 minutes, and collected the second runnings.
  • I collected 6.5 gallons of wort, a touch below my target of 6.75. So, I added 0.25 gallons of RO water, to reach the target volume. The resulting wort gravity was 1.041–pretty much exactly on target, with an efficiency of 76%.
  • I started the boil, and added the hops, Whirlfloc, and yeast nutrient per the schedule. After 60 minutes, I turned off the flame and chilled the wort down to 70°.
  • Around 5.25 gallons of wort went into the fermenter, with a gravity of 1.050. It’s nice to hit the brewing targets!
  • I pitched the dry yeast immediately, and put the beer in the fermentation chamber. I’ll be fermenting this at 54° for at least two weeks. I’m in no rush with this beer (there are three other beers in the queue ahead of it), so there is no urgency to do a fast lager schedule. I brewed this beer on 10 February 2017.

Ophidia IPA

I “needed” to brew another IPA, and was in the mood for something a bit lower in alcohol. The November 2014 issue of Brew Your Own magazine had a clone recipe for Suicide Squeeze IPA, from Fort George Brewery. It was a nice session-ish beer (4.7% abv), and the recipe called for stuff I had pretty much entirely on hand. With just a few minor modifications, my recipe was all set! The name for my personal take on this (Ophidia) refers to a scientific name for snakes, because the original Fort George product had a snake on the label for the can.

Ophidia IPA

  • 8 lbs. 3 oz. 2-row malt (California Select, Great Western Malting Co.)
  • 1 lb. Munich I malt (Weyermann)
  • 0.5 lb. caramel 40° malt (Briess)
  • 0.5 lb. flaked oats
  • 0.25 lb. Carafoam malt (Weyermann)
  • 0.45 oz. Warrior hop pellets (15% alpha), 60 minute boil
  • 1 oz. Citra hop pellets (14.1% alpha), 5 minute boil
  • 1 oz. Mosaic hop pellets (11.3% alpha), 5 minute boil
  • 2 oz. Mosaic hop pellets (11.3% alpha), 5 minute steep
  • 1 Whirlfloc tablet, 10 minute boil
  • 1 tsp. Fermax yeast nutrient, 10 minute boil
  • 2 oz. Mosaic hop pellets (11.3% alpha), dry hop in keg
  • 1 oz. Citra hop pellets (14.1% alpha), dry hop in keg

Target Parameters

  • 156° mash, 45 minutes
  • 1.053 o.g., 1.019 f.g., 4.4% abv, 52 IBU, 6 SRM, 5.5 gallons into the fermenter

Procedure

  • 24 hours in advance of brewing, I made a 1.5L starter. This is the second use for the culture–I set aside 0.55L for later use.
  • My water was 5.25 gallons of Claremont water mixed with 3 gallons of RO water and 5 g of gypsum. For the strike/first round of sparge water, I used 1.5 gallons of RO and 3.25 gallons of Claremont water, with the gypsum added directly into the mash tun. For the rest of the sparge water, I used 1.5 gallons of RO with 2 gallons of Claremont tap water.
  • I mashed in with 4.75 gallons of water 167°, to hit a mash temperature of 153°. This was a bit below my target, but I figure I’ll roll with it. I did only a 45 minute mash, before vorlaufing and collecting the first runnings.
  • I sparged with 3.5 gallons of water at 185°, to hit a mash temperature of 168° for the mash-out.
  • I collected 6.75 gallons of wort at a gravity of 1.044, for 77% efficiency.
  • I started the boil, and added the various ingredients per the schedule. After a 60 minute boil, I chilled the wort to 68° and pitched the yeast.
  • Starting gravity was 1.055, slightly above my target but not by too much.
  • I brewed this beer on February 6, 2017, and fermented at 66° for the first four days. Then, I removed it from the fermentation chamber (to make room for another beer), and fermented it at ambient room temperature with a heating pad beneath the carboy, to maintain ~68° in the fermenter.

Holy Helles & First Amendment Blonde Ale Kegged

I did a whole mess of kegging tonight, to clear out fermenter space and move along some projects.

First up was my Holy Helles (a Munich Helles), which I split into two 2.5 gallon kegs. The reason behind this was that I plan to enter it in the National Homebrew Competition, and also to serve it at Easter. I didn’t want to dose the Easter beer with gelatin (in case some of our guests don’t do gelatin), but don’t much care for the NHC one.

A few notes on the helles fermentation…on 21 January 2017, the gravity was down to 1.014. At this point, I raised the temperature from 50° to 68° for a diacetyl rest. I left it at this temperature for about a week, and then dropped it down to 34° until kegging.

Final gravity was 1.012, a touch higher than predicted (1.010). With a starting gravity of 1.047, this equals 4.6% abv. That should make a nice, drinkable beer!

Next, I kegged the First Amendment Blonde Ale. Final gravity was 1.011, down from a starting gravity 1.051, for 5.2% abv. I hit my numbers perfectly on this batch–wow, what a nice treat!

I’m storing these beers at 34°, and force carbonating the blonde ale right away.

Are homebrew experiments scientific?

e3ce2-20151107_180604As a professional scientist, I absolutely love any opportunity to meld the art and science of homebrewing. The intersection of chemistry and biology with the senses of taste, smell, touch, and sight creates endless hours of enjoyment. Even more so, I love playing with ingredients and processes to explore this beer landscape.

I’m not alone in this passion for the scientific side of homebrewing, either–two particularly prominent efforts (among others) have a solid hold in our brewing culture. The first of these is Experimental Brewing, by Denny Conn and Drew Beechum. In addition to a great website, they host one of my favorite brewing podcasts. Their mode of experimentation is to recruit IGORs (Independent Groups Of Researchers) who brew parallel batches of beer to test brewing hypotheses. The other major player in the world of homebrew experimentation is Brülosophy. This brewing team regularly investigates single variables (e.g., yeast pitch rate or addition of gelatin finings) of relevance to homebrewers, examining what (if anything) matters for your typical 5-10 gallon batch.

Over the past year or so of following these efforts, I have found some great value and food for thought in all of their experiments. The associated podcasts and blog posts pose interesting questions, and often challenge the received wisdom of homebrew tradition. Yet, the scientific side of me often wonders: Is it really science?

The short answer to this is, in my opinion, both yes and no.

Homebrew experiments are often scientific in that they propose hypotheses, design procedures to test the hypotheses, and collect data for later analysis. This is certainly necessary for science, but it’s not entirely sufficient.

I should preface my explanation on this latter point by saying that my opinions here are not intended as unthinking criticism of some really great homebrew experimentation. I love and appreciate what others are doing. That said, I do notice that the work is sometimes misused or misinterpreted within the broader homebrew culture. Some basic scientific safeguards could help to maximize the value of homebrew experiments and minimize confusion. So, my post is less about breaking down the current “system” (if it even really is a system) and more about what we can add to improve the value of homebrew experiments. Even more so, it’s about how those of us who read the “exbeeriments” should interpret them!

  • Expand the brewing scenariosAs is readily acknowledged by most brewing experiment writers, results of a particular experiment are really only applicable to those experimental conditions. For instance, if you find that there is no difference between a 20 minute and a 60 minute boil for a stout, the results probably shouldn’t be extended to a blonde ale. More experiments at a homebrew scale are needed!
  • Emphasize limitations. This follows pretty logically from the point immediately above. I think that most of the brewing experiment write-ups out there do this pretty well, so it’s more of a caution for those who read and try to apply the results.
  • Record methodology in detail. Brülosophy sets a high bar for this, and is able to do so because their brewing is done typically by a single person. The IGORs do good work, but the distributed nature of the brewing means that a lot of the details on their brewing setups and techniques aren’t immediately available. Different brewers often have very different techniques. Unfortunately, this can raise a lot of basic questions about experimental results and interpretation. Experimental Brewing did a great episode highlighting differences between brewers’ techniques and how it affected an experiment related to bitterness. This was indeed illuminating!
  • Pair sensory perception analysis with laboratory analysis. The aforementioned Experimental Brewing episode did this really well, in terms of evaluating differences in IBU yields across different recipes and setups, as did a Brülosophy exbeeriment related to loose vs. bagged hops in the kettle. This approach really helps to nail down the interpretation of results (especially for those related to bitterness), although I also admit it is potentially expensive.
  • Engagement with the brewing literature. There is an ocean of literature from the commercial brewing world, much of it published in formal scientific journals, yet this is rarely if ever incorporated into the homebrew world in any meaningful way. There are reasons for this, of course…for instance, much of this literature pertains to giant commercial brewing setups and cannot be transferred confidently to the homebrew scale. Also, much of the literature is technical and paywalled, so might as well not exist for most hobbyists.
  • Peer review and formal publication. Is it time for a Journal of Homebrewing Science? If there is a single thing that would improve homebrew experiments, it would be formal, independent peer review and a mechanism for publication of these reviewed results. Comments on blog posts do provide one form of review, but this is not always reflected by modifications in the experiments or changes in interpretation of the experiments. If I were to be really ornery, and I suppose I am because I am writing this post, I would suggest a multi-step peer review process handled by an independent review or editorial board for brewing experiments.
    • Design the experiment, and open it up for input.
    • Modify the experimental design as required.
    • Run the experiment.
    • Write up the results, and open the write-up for review.
    • Following the review, revise the write-up accordingly.

Overall, I love the experimental approach to homebrewing. I think it illuminates some really interesting facets of our hobby, and helps brewers to be more and more thoughtful in their technique. We’re now at the stage where we can push things to the next level–so let’s do it!

Beer Tasting: Palaeotis Pils

20170128_124227My Palaeotis Pils, falling within the German pils style, has been on tap for a few weeks now, and seems to be reaching a peak in quality. Time for a tasting!

  • The Basics
    • Original gravity = 1.048, final gravity = 1.011, abv = 5.0%, estimated IBU = 34
  • Appearance
    • Pale straw appearance, brilliantly clear, with a tall, fine, white head that settles to a persistent blanket across the top of the beer.
  • Aroma
    • A very gentle malty sweetness with a spicy hop note behind that.
  • Flavor
    • Bready malt profile, with a firm bitterness that lingers after each sip. It’s definitely a bitter beer, but not out of balance for what I wanted.
  • Mouthfeel
    • Carbonation is appropriately high for the style, and it has a crisp, medium-dry finish.
  • Would I brew this again?
    • Absolutely! This is an exceptionally nice beer; it nails pretty much every point of the style, and is easy drinking, too. German pils is probably a little hoppier than I would always want in a pale lager, but that’s more of a stylistic thing than a flaw in this particular recipe. The other night, I ordered a glass of Bitburger, often considered a “classic” German pils. Although I didn’t taste them side-by-side, I can say that mine hits many of the same notes as this commercial example. I have my pils entered in an upcoming competition, so we’ll see how my assessment compares to that of the BJCP judges.
  • Overall
    • 10/10