Dark Helmet Schwarzbier

As I continue to work my way through lager styles, I also realized that a lot of my recent brews have been fairly light (at least color-wise). This generally fits my summer drinking preferences, but I’m starting to get the itch for something with just a touch more robustness. Now, I don’t want anything too dark and filling (after all, it’s still hot here!), and I’ve been doing a lot of amber type beers recently, so schwarzbier sounded intriguing.

To sum up the BJCP 2015 style description, schwarzbier should be roasty yet also highly drinkable. That’s intriguing! I’ve maybe only sampled one or two in the very distant past (if ever), so I was a bit in the dark (no pun intended) as to how I should craft the recipe. So, I turned to the ever-reliable Brewing Classic Styles by Zainasheff and Palmer. With a few minor adjustments for ingredients, I was ready to roll. Following the lead of Gordon Strong, I elected to add all of the dark and crystal malts at vorlauf. This is supposed to impart a smoother character, and I figured it couldn’t hurt to try.

As for the name of this brew, I’m not the first to be so clever, but that didn’t deter me. The schwartz is strong with this one.

20170703_083848.jpg

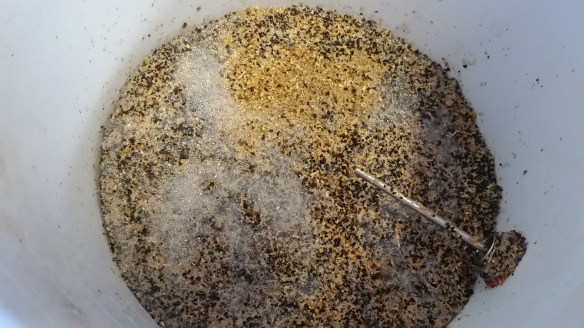
Spent grains after the mash

Dark Helmet Schwarzbier

  • 4.5 lbs. Munich I malt (Weyermann)
  • 4.25 lbs. Château Pilsen malt (Castle Malting)
  • 6 oz. chocolate malt, added at vorlauf (Briess, 350 SRM)
  • 6 oz. crystal 40 malt, added at vorlauf (Great Western)
  • 3.5 oz. black barley malt, added at vorlauf (Briess)
  • 3.5 oz. Carafa Special II, added at vorlauf (Weyermann)
  • 1.25 oz. Liberty hop pellets (4.9% alpha), 60 minute boil
  • 0.75 oz. Liberty hop pellets (4.9% alpha), 5 minute boil
  • 1 tsp. Fermax yeast nutrient, 10 minute boil
  • 1 Whirlfloc tablet, 10 minute boil
  • 2 pkg. SafLager West European Lager yeast (S-23)
  • 1 pkg. SafLager Lager dry yeast (W34/70)

Target Parameters

  • 1.046 o.g., 1.011 f.g., 4.6% abv, 26 IBU, 28 SRM, 5.5 gallons into the fermenter
  • Water built from RO and tap water to hit target of 67 ppm Ca, 7 ppm Mg, 27 ppm Na, 30 ppm SO4, 89 ppm Cl, 126 ppm HCO3, 103 ppm alkalinity, and 51 ppm RA.
  • 60 minute mash at 152°, batch sparge, 60 minute boil

Procedure

  • For my mash water, I used 3.25 gallons of RO with 1 g table salt and 3.5 g calcium chloride. For the sparge water, I treated 5 gallons of Claremont tap water with a quarter of a Campden tablet. All together, this should hit my general brewing water parameters as outlined above.
  • I mashed in with 3.25 gallons of water at 162.6°, to hit a mash temperature of 153.5°. This was down to 150° after 35 minutes.
  • I sparged with 1.5 gallons of water at 175°, let it sit for 10 minutes, added the dark grains, vorlaufed, and collected the first runnings.
  • Then, I sparged with 3.5 gallons of water at 175°, let it sit for 10 minutes, and collected the second runnings.
  • All together, I collected 6.8 gallons of wort at a gravity of 1.039, for 72% efficiency.
  • I started the boil, and added all of the hops, etc., per the schedule in the recipe.
  • After 60 minutes, I chilled the wort to 80° and put it in the fermentation chamber to chill for a few hours, until the beer was down to 48°.
  • I pitched the two packets of S-23 into a slurry of distilled water, which did show appropriate activity. But, I also noted that they were expired by 10 months.
  • There wasn’t any real activity visible in the fermenter after around 24 hours, so I opted to pitch in some extra yeast. Luckily, I happened to have a few packets of W34/70 on-hand. Fermentation was underway visible around 48 hours after the initial pitch. Perhaps I was being overly cautious, but I figured it couldn’t hurt.
  • I am fermenting this at 50°. Starting gravity was 1.046.
  • I brewed this batch on July 3, 2017.

A good use for extra fruit puree

I had about 2 cups of raspberry puree left over from the can I added into my in-progress Raspberry Belgian, and was at a bit of a loss as to what to do with it. I didn’t want to let it go to waste, but it’s also not really the sort of thing you can use that readily (outside of a smoothie, I suppose, but I think fresh fruit is way tastier for a smoothie).

Suddenly…inspiration! With grilling season well at hand here in southern California, I decided to roll the leftover puree into a nice marinade. My intention was to make something slightly smoky/sweet/spicy, and the end result definitely succeeded!

This was somewhat thrown together, so the recipe below is just general proportions. So, you should probably modify to taste. You could probably substitute any reasonably “hot” pepper into this–we just happened to have some jalapeños in the freezer.

Raspberry Jalapeño Marinade

  • 2 cups raspberry puree (Vintner’s Harvest brand)
  • 1/2 grilled and seeded jalapeño pepper
  • 1/2 cup canola oil
  • 2 tbs. lime juice
  • 1 tbs. minced garlic
  • salt to taste
  • a dash of paprika

Procedure

  • Combine all ingredients, and thoroughly blend using an immersion blender.
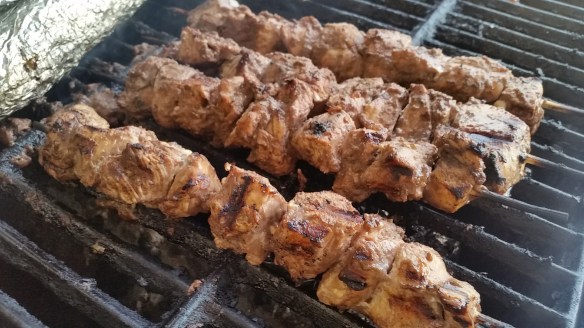
  • This produces enough marinade for around 4 large chicken breasts. I cubed the breasts into pieces around 1 or 2 inches across, and let them marinate in the fridge for a few hours. Then, I put the chicken on skewers and grilled over a medium heat. I drizzled extra marinade over the skewers around midway through cooking.
  • The result was really tasty! Interestingly, the raspberry flavor itself didn’t come through that strongly–it was more as a tart accompaniment to the mild heat of the grilled pepper.

20170709_174059

I had a bit of uncontaminated marinade set aside, perhaps a quarter cup total. I mixed this with about a cup and a half of non-fat yogurt, a teaspoon of garlic, a dash of paprika, and a teaspoon of lime juice, for a really tasty yogurt sauce. This made a nice accompaniment for dipping the grilled chicken (as well as the vegetables I also grilled). We have a bit left over, so I think it will be going onto some fish tacos later this week.

The Session #125 — Pale European Lagers: The Ultimate SMaSH beers

thesessionNote: This is my first time contributing to The Session, a monthly blogging challenge for beer aficionados. For The Session #125, Mark Linder chose the topic of SMaSH (single malt and single hop) beers.

SMaSH beers–those brews marrying a Single Malt variety and a Single Hop variety–are often promoted as something that’s interesting to try but not particularly versatile. As a homebrewer, I’ve usually thought of them as a tool to explore ingredients, perhaps fun as a technical gimmick but not necessarily a pathway to truly exceptional beer. Sure, you could get some good stuff, but it would lack complexity and get boring after a few pints. SMaSH beers were a way to turn out some pale ales with funky new hop varieties, but these were only a brief stop along the journey to a more worthy recipe. Don’t even bother entering them in a BJCP competition, because they won’t hold up well relative to their rivals with a longer ingredient list.

Then I discovered the Bohemian pilsner.

When I first sampled American-style craft beer, the cheap American lagers of my early days faded into mental oblivion. Why even bother with a watery fizz-drink, when you could blast your taste buds with a triple imperial IPA touting 190 IBUs, 12 percent alcohol, and five varieties of hops? Or what about a delightful English porter, with its malty backbone and slightly fruity yeast character? Clear beers were for quitters and college students. European lagers were mildly intriguing, but typified by badly aged and skunky six packs in green bottles. Why bother with that, when there was a world of fresh local craft brew and homebrew to explore?

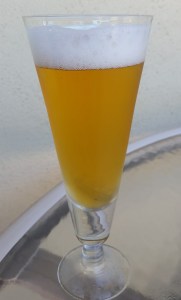
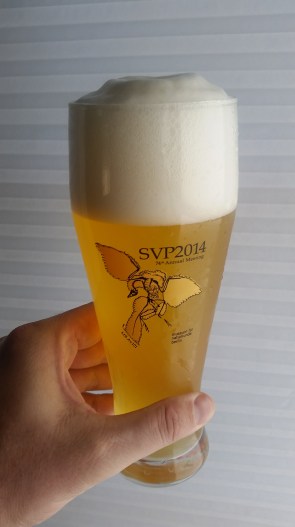
An Archaeopteryx-linked beer requires the appropriate glassware.

My first homebrewed Bohemian pilsner (made with genuine Jurassic ingredients!)

Not too long ago, though, I decided to dip my homebrewing toes into the lagered waters. Bohemian pilsner (a.k.a., Czech pilsner, a.k.a., Czech premium pale lager in the 2015 BJCP guidelines) caught my attention early on…it was the original pilsner, after all! What better way to learn what this beer is all about?

Yet, I was shocked by the simplicity of the classic recipes! Bohemian pilsner malt. Czech-sourced Saaz hops. Soft water. Clean lager yeast. The rest is just up to technique–in particular, a good decoction mash was apparently the key to success.

My first attempt at a Bohemian pilsner wasn’t perfect, but wow, it was pretty darned good. This was the first time I consciously experienced Saaz hops, finally getting a name to match with that distinctive aroma and flavor. It was also the first time I experienced a genuinely fresh European-style lager in the United States, and I finally knew what the big deal was all about.

This spurred a realization. SMaSH beers weren’t just for pale ales. In fact, pale lagers are the most reliable ticket to SMaSH success. Quality malt. Quality hops. Careful water chemistry. A clean fermenting lager yeast. A bit of skill. All of this combines to a memorable and surprisingly complex brew. Of course, Czech pilsner isn’t the only lager style with a simple recipe. Munich helles, German pils, and others jostle alongside in the running. Any of these can be done quite well with a short shopping list. This is what makes them so hard to do exceptionally well, perhaps–any flaws can’t hide behind crystal malt and yeast esters.

So, what’s the style best suited to a SMaSH beer? I love all of my European pale lagers, but Bohemian pilsner wins for me every time.

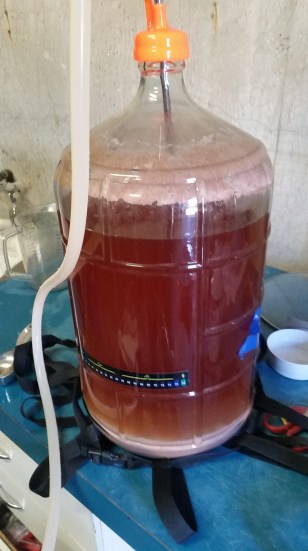
Raspberry Belgian 1.1

In another brew for the Lake Arrowhead Event, I’m doing a second attempt at my Raspberry Belgian. The first version turned out reasonably well, although I felt like it needed a bit more tartness as well as a bit more body. I thought the body could be augmented by doing a batch sparge instead of a no-sparge technique; the latter consistently leads to low efficiency on my system and thus a lower starting gravity. As for the tartness…I elected to do a kettle sour instead of improvising with acid malt.

Recently, one of my fellow homebrew club members presented on kettle souring, particularly his approach with using a yogurt-based culture. Now, I’ve done kettle souring once before–with incredible results–but in that case I used a commercial lacto strain specifically for homebrewers. I was intrigued by the thought of souring more cheaply, and thought this was a great batch in which to give it a try.

sour_culture

Sour culture ingredients and tools

For my culture, I chose The Greek Gods’ brand nonfat Greek yogurt–other homebrewers have reported success with it, and it has a nice blend of various lacto strains. So, 24 hours before my planned brew session, I made a 1L starter (1 L water, 100 g extra light DME, and a pinch of Fermax yeast nutrient) with 3 tsp. of yogurt. Because I’m not using a stir plate, next time I’ll want to break up the yogurt a bit; I noted that the first clump I put in never really broke up well, even with some gentle swirling. Greek yogurt is thick! I let the starter sit overnight on a heating pad set for 100° (I taped the sensor on the side of the flask). By the next day, it had a nice sour aroma, so I deemed it ready to go.

Raspberry Belgian 1.1

  • 5 lbs. Château Pilsen malt (Castle Malting)
  • 2 lbs. white wheat malt (Great Western Malting)
  • 0.5 lb. carapils (Briess)
  • 0.5 lb. flaked oats (store brand quick oats)
  • 0.5 lb. flaked wheat
  • 0.20 oz. Warrior hop pellets (15.8%), 60 minute boil
  • 0.15 oz. Willamette hop pellets (4.9%), 15 minute boil
  • 1 Whirlfloc tablet, 10 minute boil
  • 0.5 tsp. Fermax, 10 minute boil (added before souring)
  • 1 tsp. Fermax, 10 minute boil (added after souring)
  • 1 pkg. Belgian Wit Ale yeast (WLP400), prepared in 1L starter
  • 4.25 cups (1 L) raspberry puree (Vintner’s Harvest brand)

Target Parameters

  • 156° mash, 60 minutes
  • 10 minute boil and 24 hour kettle sour prior to 60 minute boil
  • 1.044 o.g., 1.012 f.g., 4.2% abv, 14 IBU, 3 SRM, 5 gallons into the fermenter

Procedure

  • I prepared the sour culture as specified above, 24 hours in advance.
  • On brew day (part I), I mashed in with 3 gallons of water at 166.5°, to hit my mash target temperature of 156° right on the nose!
  • I added 1.6 gallons of water to sparge, vorlaufed, collected first runnings, and then added 3.5 gallons of water for the second sparge.
  • In total, I collected 6.75 gallons of wort at a gravity of 1.038–81% efficiency!
  • Using 3.5 tsp. of 88% lactic acid, I adjusted the pH of the wort to around 4.2. This was a slight overshoot of my target, but I figured I would be OK.
  • I boiled the wort for 10 minutes, adding the first bit of Fermax. After 10 minutes, I chilled the wort to ~100° and then added the yogurt culture. I left the kettle on a heating pad, with the temperature controller set to 100°.
  • After ~21 hours, the temperature had settled to around 94°, and the pH was down to ~3.1 (a bit too sour for my tastes!). I added 1.5 tsp. of chalk to the kettle to raise things up a bit.
  • I boiled the wort for 60 minutes, adding the various ingredients per the schedule in the recipe. At the end, I chilled the wort down to 80° and then transferred it into my fermenter. Six gallons of wort made it in. I then did the remaining chill to 66° in my fermentation chamber. I pitched the yeast, and let things move along.
  • The final pH prior to the yeast pitching was 3.39; much more reasonable. It may even be a bit too tart yet, but we’ll see. Starting gravity was 1.044, right where I wanted it to be!
  • I brewed the beer and pitched the yeast on 27 June 2017. Initial fermentation was at 66°. After 4 days, on 1 July 2017, I added 4.25 cups of raspberry puree and raising the temperature to 68°.

Thumbspike Saison 2.1

The Lake Arrowhead Brewfest is coming up in August, and I’ll be there with the Horse Thief Brewing Association to serve up some tasty homebrews! I’ve promised two beers–one is the second iteration of my raspberry Belgian, and the other is my wild hop saison! I recently kicked the keg on this one, and I was overall pretty pleased with it.

The latest version of Thumbspike Saison is virtually identical to the last, with only a few very minor changes. First, I did a mix of Bohemian and Belgian pilsner malt for the grist, because my floor-malted Bohemian pilsner malt was nearly gone. Second, I ditched the rice hulls from the grist, because the percentage of wheat was so low as to be a non-issue for sparging (and this was proven in the easy collection of the first and second runnings). Finally, I modified the hop schedule very slightly to try and increase the hop character in the brew.

20170625_205023

Thumbspike Saison 2.1

  • 5.25 lbs. Château Pilsen malt (Castle Malting)
  • 4 lbs. floor-malted Bohemian pilsner malt (Weyermann)
  • 0.75 lbs. Munich I malt (Weyermann)
  • 0.75 lbs. white wheat malt (Great Western Malting Co.)
  • 1 oz. Carafa Special II (Weyerman)
  • 1.1 oz. whole wild hops (5.8% alpha), 60 minute boil
  • 0.5 oz. whole wild hops (5.8% alpha), 10 minute boil
  • 1 oz. whole wild hops (5.8% alpha), 2 minute boil
  • 1 Whirlfloc tablet, 10 minute boil
  • 2 pkg. French Saison Ale dry yeast (Mangrove Jack’s M29)

Target Parameters

  • 1.056 o.g., 1.003 f.g., 7.0% abv, 26 IBU, 7 SRM, 5.5 gallons into the fermenter
  • 90 minute mash at 148°, batch sparge, 60 minute boil

Procedure

  • To use up my RO water and thin out the Claremont waters a bit, I added 1.5 gallons with 2.2 gallons of tap water for my mash water. I heated it up to 160°, added the water to the mash tun, and let it slide to 157°, before adding the grains. This hit a mash temperature of 148.3°, which was down to 144° after 90 minutes.
  • After 90 minutes, I added 1.2 gallons of water at 170°, let it rest for 10 minutes, vorlaufed, and collected the first runnings. I then added 3.5 gallons of water at 170°, let it sit for 10 minutes, vorlaufed, and collected the remainder of the runnings.
  • In total, I collected 6.75 gallons with a gravity of 1.048, for 80% efficiency.
  • I aimed for a 60 minute boil, adding the various hops and finings per the schedule.
  • After 60 minutes, I turned off the flame and started chilling. Once I hit 85° (which is pretty close to the limit of what I can chill with our water during the summertime!), I transferred to the primary fermenter and pitched the yeast.
  • I brewed this beer on June 25, 2017. Starting gravity was 1.055, nearly exactly hitting my target gravity.
  • I plan to ferment at ambient temperature, which is around 75°. It will probably sit for a few weeks, because I am in no particular rush to get this batch on tap.