
Holy Helles

After years of avoiding lagers, I’m diving into the deep end. In the past two months alone, I’ve done a German pils and a Vienna lager, and these were hard on the heels of a Bohemian pilsner and another Vienna lager. I’ve generally used a faster fermentation and lagering schedule for my lagers, but for this batch I wanted to A) take my time a bit; and B) try out a style I haven’t brewed previously. The idea of a Munich helles is appealing because it is supposed to be a very malt-forward style with minimal bitterness, so it’s likely to be of broad interest to more people than something more bitter. Also, by slowing down the process I also can clarify without gelatin, which also means strict vegetarian/vegan types can drink it without complaint. Overall, a Munich helles seemed like a nice change from my most recent batches, and I figured it would make a nice brew to serve with Easter dinner. So, I’m calling this batch “Holy Helles”. I’ll note I’m not the first brewer to think themselves so clever, but I’m sticking with it anyhow.

The recipe isn’t based on anything in particular; I read across a number of sources to come up with the combination of malt, yeast, and hops. This should hit the “sweet spot” for the particulars of the Munich helles style.
20170107_103335

Holy Helles

  • 8.25 lb. floor-malted Bohemian pilsner malt (Weyermann)
  • 1.25 lb. Munich I malt (Weyermann)
  • 3 oz. BEST acidulated malt (BESTMALZ)
  • 2 oz. Carapils malt (Briess)
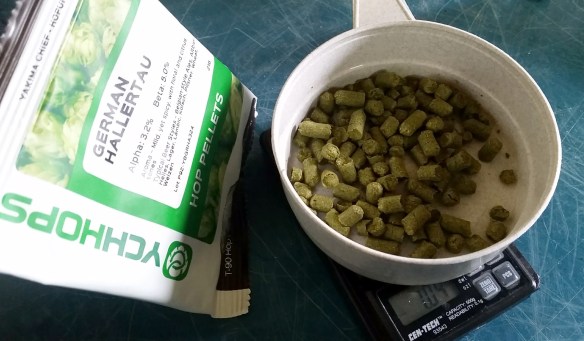
  • 1.5 oz. German Hallertau hop pellets (3.2% alpha), 60 minute boil
  • 0.5 oz.German Hallertau hop pellets (3.2% alpha), 10 minute boil
  • 1 Whirlfloc tablet, 10 minute boil
  • 1 tsp. Fermax yeast nutrient, 10 minute boil
  • 1 pkg. Southern German Lager yeast (WLP838, White Labs)

Target Parameters

  • Multiple infusion and single decoction mash, 20 minute rest at 130°, infusion to hit 45 minute rest at 148°, thick decoction to raise temperature to 168°. Batch sparge.
  • Water built from R.O., to hit 44 ppm Ca, 2 ppm Mg, 22 ppm SO4, 68 ppm Cl, and 5 ppm bicarbonate.
  • 1.046 o.g., 1.010 f.g., 4.8% abv, 19 IBU, 4 SRM, 5.5 gallons into fermenter

Procedure

  • Several days in advance, I made a 2L starter, let it run for 2 days, and then cold-crashed.
  • I calculated that I would need 9.2 gallons of water, so weighed out 1 g of gypsum, 0.7 g of epsom salt, 5.4 g CaCl, and 0.3 g baking soda for my mineral additions. I split these into 2 parts. Half of the mass will go into the strike water and half into the sparge water.
  • I added 2.45 gallons of water at 148° to my mash tun, and let the mash tun warm up until it hit 143°. Then, I added my grains, and achieved my target acid rest temperature of 143°.
  • After 20 minutes, I added 1.5 gallons of water at 186°, to hit a mash temperature of 146°. It was down to 143° after 35 minutes, and at more or less the same temperature after 45 minutes total. I decocted 1.5 gallons of a medium-thick mash, brought it to a boil, boiled for 10 minutes, and added it back in to the mash to hit a mash-out temperature of 163°. I let this sit for 10 minutes before draining the mash tun to collect the first runnings.
  • I added 5.25 gallons of water at 180°, let the mash sit for 10 minutes, vorlaufed, and collected the second runnings.
  • In total, I collected 7.6 gallons of wort with a gravity of 1.044–that’s 90% mash efficiency! I chalk it up to the decoction, and that’s awesome, but the end result would be too high in gravity. So, I added 1 gallon of RO water to dilute everything down to 1.040 and get 8.6 gallons.
  • I targeted a 90 minute boil time. Once I started the boil, I thus waited 30 minutes before adding the first round of hops. Other hops and additions were made per the schedule in my recipe.
  • Nine minutes before flame-out, I checked gravity again and saw that it was at 1.048, a touch higher than my target. So, I added another 0.5 gallon of RO water.
  • After flame-out, I chilled the wort down to 72°, and got ready for the transfer.
  • There was a lot of wort, so I drained the first gallon of trub off in order to keep the portion going into the fermenter fairly clean. Even with this, I ended up with just under 6 gallons of wort in the fermenter.
  • I popped the fermenter into my fermentation chamber, and set it for the final chill down to 45°. Once I hit this (about 6 hours later), I pitched the yeast and set the temperature to 50°.
  • I brewed this beer on 7 January 2017. It had a starting gravity of 1.047 (just a touch above target).
  • I had minor signs of fermentation within 24 hours and fairly good krausen within 48 hours. Three days into fermentation, we lost power for ~16 hours. The fermentation was thus unregulated for that stretch. I wasn’t able to check on the beer (being laid up in bed with a bad cold), but presumably the temperature went up just a touch (although the ambient temperature remained around 60°).
  • I did a check on the beer on 15 January 2017. There was a strong sulfur aroma coming from the fermenter. The gravity was 1.020, for 56% apparent attenuation. On this day, I raised the fermentation temperature to 52°. Fortunately, I didn’t detect any off (e.g., fruity) flavors in the beer, so I am satisfied that the brief power loss wasn’t too detrimental.
  • My planned fermentation schedule is 7 days at 50°, 7 days at 52°, 7 days at 54°, 4 days at 68°, and then a week or so at 32° before transferring to the keg for long-term lagering. This will allow me about 2 months of dedicated lagering before I serve this at Easter.
Update: Good Riddance Pale Ale and Eagle Face Oatmeal Stout

Tonight it was time to keg my most recent pale ale and my annual oatmeal stout batch.

Good Riddance Pale Ale, after 20 days in the primary fermenter, was down to 1.011 from a starting gravity of 1.053. This equates to 5.6% abv. As I kegged the beer, I added a weighted mesh bag with the dry hops (1 oz. Amarillo hop pellets, 1 oz. Falconer’s Flight 7C’s hop pellets). I’ll be letting this sit at ~68° under carbonation pressure for at least a few days before serving.

Eagle Face Oatmeal Stout (1.4) had been in the primary fermenter for 15 days. It had a starting gravity of 1.060 and a final gravity of 1.019, equal to 5.4% abv. The gravity was a few points more attenuated than expected–most likely due to the slightly lower-than-normal mash temperature for this particular iteration.

This whole undertaking was a good reminder of why I am glad I was able to switch over to kegging–it took barely an hour to sanitize the kegs, keg the beers, clean my transfer equipment, and set the fermenters to soak! I would have needed up to twice that time for bottling!

Beer Tasting: Wild Times Pale Ale

20161226_163216The Wild Times Pale Ale is no more…but I did get a tasting in before the 2.5 gallon keg was all gone!

  • The Basics
    • Original gravity = 1.046, final gravity = 1.011, abv = 4.7%, estimated IBU = 45
  • Aroma
    • Faintly floral hop aroma, with a very light caramel malt aroma.
  • Appearance
    • Brilliantly clear and light yellow in color, with a low white head that is pretty persistant.
  • Flavor
    • A lightly grainy and bready malt aspect; the hop flavor tends towards the distinctly (but not overly) bitter. The bitterness is fairly uncomplex, and the hop flavor has a slightly grassy aspect to it with a faint edge of citrus pith. It’s not bad, just not exceptional.
  • Mouthfeel
    • A pretty dry and light-bodied beer.
  • Overall
    • This is a pretty average pale ale. It’s not bad; it just doesn’t have much that pops out at me. It needs a bit more body and malt complexity; this probably would entail a bit of crystal malt and/or a second base malt (Munich or Vienna, perhaps) to round things out. I also ended up with a slightly lower gravity than expected after the boil, which doesn’t help matters much either. The aroma hop attributes have definitely diminished a bit over time. At their peak, they were surprisingly good, particularly as a novelty item. For an experimental beer, this was certainly a worthy attempt, but any future pale ales will need a different malt base.
  • Score
    • 5/10

Eagle Face Oatmeal Stout (1.4)

Time to do the semi-annual brew of my world-famous recipe (by virtue of appearing in Zymurgy), Eagle Face Oatmeal Stout! This iteration has only small modifications, to account for my current mash efficiency (~75%), which means a slight reduction in the amount of base malt. I also changed the hops (to use up one of my high-alpha hops), which shouldn’t result in a substantive difference for the flavor profile because they’re really just for bittering anyhow. Finally, I toasted my oatmeal to try something a little different. The day before brewing, I set the oats in a 350° oven for 1.25 hours, which resulted in a nice toasty aroma and crispier oats with a slight golden edge on most of the flakes. We’ll see how that changes stuff (if it does).

20170101_135414

Toasted oats, ready for the brew.

Eagle Face Oatmeal Stout 1.4

  • 7.5 lbs. 2 row malt (Great Western)
  • 1.5 lbs. old-fashioned oats (lightly toasted)
  • 1 lb. 80° L crystal malt (Briess)
  • 1 lb. Victory malt (Briess)
  • 0.75 lb. chocolate malt (Briess)
  • 0.5 lb. roasted barley (Bairds)
  • 0.38 lb. rice hulls
  • 1 Whirlfloc tablet, 10 minute boil
  • 0.82 oz. Magnum hop pellets (13.2% alpha), 60 minute boil
  • 1 pkg. English Ale yeast (White Labs WLP002, in starter)

Target Parameters

  • 156° mash, 60 minutes
  • 1.061 o.g., 1.022 f.g., 5.1% abv, 37 IBU, 41 SRM, 5.5 gallons into the fermenter

Procedure

  • A few days in advance of the brew, I prepared a 2L starter. After two days on the stir plate, it was starting to flocculate out, and so I cold-crashed the starter. I split the starter into a 1.4L volume for pitching in this batch, and set aside 0.6L for a later brew.
  • As with my most recent brewing session, I have modified my mash procedure slightly. I added the strike water directly to the unheated mash tun, and then added the malt after temperature stabilized at my desired strike point. In this case, I added 4.2 gallons of water at 180°. Once in the mash tun, the temperature dropped to 175°, a bit above my target of 168.7°. So, I let things sit until it matched my target, and then mashed in. For future reference, I should only overshoot my strike water temperature around 5° or so; this will result in a little bit shorter time to reach the planned temperature in the mash tun.
  • My mash temperature settled at 154-156°, depending on where I measured it in the tun. It was down to 152° after 45 minutes. After 60 minutes, I added 0.75 gallons of water at 185°, let sit for 10 minutes, vorlaufed, and collected the first runnings. I then added another 3.5 gallons of water at 175°, which raised the mash bed to 160°. After sitting and vorlaufing, I collected the second runnings.
  • In total, I collected 6.4 gallons of wort at a gravity of 1.052, for 76% mash efficiency.
  • I started the boil, adding ingredients per the schedule. After 35 minutes of boiling, I added an additional 0.25 gallons of R.O. water, to bring up the boil volume slightly and drop the gravity slightly.
  • After a 60 minute boil, I turned off the flame and started chilling. Once I got down to 70°, I transferred the wort (while aerating with the usual Venturi pump and wort sprayer) into my primary fermenter.
  • My pre-fermentation volume was 5.25 gallons, up to 5.5 gallons (approximately) once I pitched the yeast.
  • Starting gravity was 1.060, close enough to my target for me to be happy (anything within 0.001 is well within instrument measurement error)! I’ll be fermenting at 68°. This batch was brewed on 2 January 2017.

Brew Year’s Resolutions for 2017

It’s 2017! After a great year of achieving many brewing goals during 2016, it’s time to set some goals for the next year. What’s on tap for my Brew Year’s Resolutions?

Update: I also sent in one of my resolutions (the sci-comm one) for the Experimental Brewing podcast by Denny Conn and Drew Betchum. The episode is available at their website–my piece of audio starts at the 19:40 mark.

  • Do more science communication with homebrew as a vehicle.
    • Last year, I had the goal of pitching a story idea to a major homebrew magazine–and got an article published in Zymurgy! The short piece focused on the ways in which I blend homebrewing and paleontology, and has led to another article that should (if all goes well) be out early this year. I’ve really enjoyed the research and finding connections between my two passions in life, and find that it’s also an interesting topic for many other people. To that end, I want to do more of this kind of stuff–in particular, I’m hoping to turn some of my research into a presentation on the topic that can be given for a variety of audiences (contact me if you’re interested in having me speak for your group!).
  • Pitch another article for a homebrew publication.
    • I have some ideas for (non-paleontology) articles on homebrewing, and want to get a pitch or two out there early this year.
  • Explore lagers and pilsners in more depth.
    • Last year I started brewing these styles in earnest, encouraged by the Fast Lager schedule that is increasingly popular. I also recently bought a second fermentation chamber, which will be added encouragement (and space) for lagering. After years of doing traditional American ales (and not brewing a lot of most English and Belgian styles), I want to delve much more deeply into European and American lagers. There are a lot of options, and I want to try as many as I can! In just a few days, I’ll be making a Munich Helles that should be ready just in time for Easter.
  • Use water chemistry more effectively.
    • I’ve recently started playing more with my brewing water, in part because I have started making styles such as Bohemian pilsner that don’t mesh well with our super-hard local water. My personal tasting evaluations have found that my blonde ales and a Belgian wit were also a bit “flabby”, which I also attribute (in part) to the tap water. This year, I want to do more with water adjustments on those light-color brews that really need it.
  • Dial in my brewing system parameters more tightly.
    • I’m achieving pretty good predictability on my brewing temperatures and volumes, but want to dial it in to the next level. Mostly, this will entail reviewing past batches and adjusting the settings in BeerSmith.
  • Enter at least three homebrew competitions.
    • I entered two last year, and had decent success. Although I’m still not a regular on the competition circuit (and may never be), I would like to keep getting feedback on my beers via BJCP-type competitions. There are two local ones coming up in the immediate future, and I want to do at least one more beyond that.