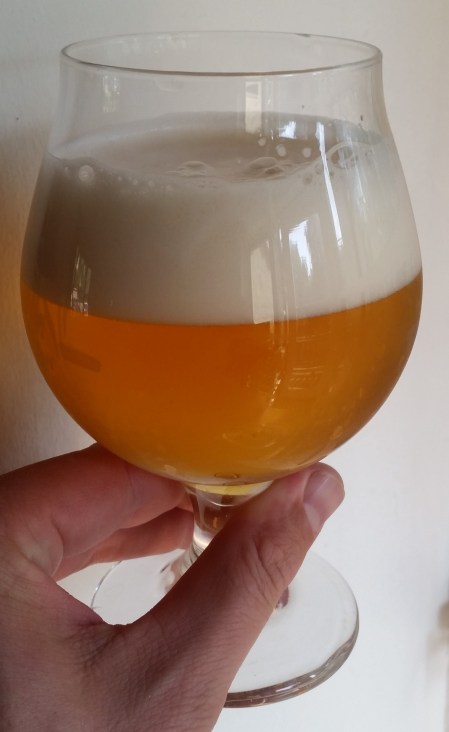
Lithographica Pilsner

Hobbies have a way of sneaking up on you. My homebrewing started in earnest nearly eight years ago, when I bought some basic equipment and ingredients for a red ale. For the next few years, things chugged along with various recipes–all extract-based, and some pretty decent. Then I moved into a larger place with a dedicated garage and utility sink, and before I knew it I was expanding to full volume boils and all-grain batches. Add in temperature-controlled fermentation and a kegging setup, and things have really taken a turn for the serious.

When I started brewing, each of those subsequent technique and equipment additions were unimaginable. I didn’t have space for many things, and it was taking a good bit of energy to keep on top of the very basics of sanitation, wort chilling, and bottling. Techniques like all-grain brewing seemed like way too much hassle for my time and available facilities. Then, I got practiced, and I got space. As the basics started to become second nature, they also got a little mundane. I wanted some spice in my brewing life, and suddenly all-grain brewing didn’t seem so intimidating after all. I added all-grain brewing to my tool-kit, and have spent more than two years learning and perfecting that. Many aspects of the process are second nature now…which means I’m in a headspace where I can think about adding even more tools to my brewing toolkit.

And here I am staring down at decoction mashing.
Pilsner Malt

Decoction mashing is a long, intimidating process, and quite frankly unnecessary in many cases. Yet, it is also a deeply traditional part of brewing, and for some malts and some recipes may indeed add a bit of flavor and body not possible with infusion mashes.

I recently decided to do another pilsner, and a Bohemian pilsner seemed like a good match. I researched and designed a recipe, aiming to incorporate authentic Bohemian ingredients wherever possible. It was quite a brew day–nearly eight hours–but worth the experience and hopefully worth the beer.

I chose the name “Lithographica Pilsner” owing to a special connection between paleontology and brewing; more on this in an upcoming post!

Lithographica Pilsner

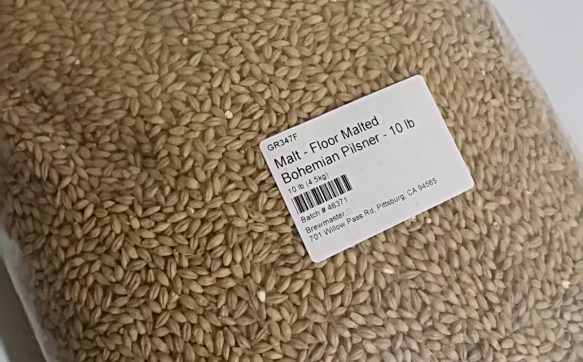
  • 10 lbs. Floor-Malted Bohemian Pilsner malt (Weyermann)
  • 3 oz. Saaz whole hops (2.7% alpha), 60 minute boil
  • 1 oz. Saaz whole hops (2.7% alpha), 30 minute boil
  • 1 oz. Saaz whole hops (2.7% alpha), 10 minute boil
  • 1 oz. Saaz whole hops (2.7% alpha), 5 minute steep
  • Pilsner Lager Yeast (WLP800, White Labs), prepared in starter
  • 1 Whirlfloc tablet (10 minute boil)
  • 0.5 tsp. yeast nutrient (10 minute boil)

Saaz Hops

Procedure

    • Four days in advance, I prepared a 2.25L yeast starter, with 233 grams of dry malt extract. I ran it for two days until it fermented out, and then cold-crashed it until it could be decanted and pitched.
    • I used two 4.5 gallon volumes of water — 4.5 gallons for the mash, and 4.5 gallons for the sparge. Each 4.5 gallon measure started as distilled water, with 0.5 g of calcium chloride.
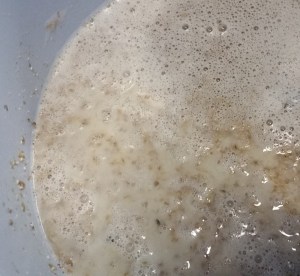
Mash during the acid rest.

Mash during the acid rest.

  • I added 11 quarts of water at room temperature, to hit the dough-in temperature of 72°. I let this sit for 30 minutes, before proceeding to the next step.
  • Next, I added 1.6 gallons of water at 176°, to hit the acid rest temperature of 105°. I let this sit for 10 minutes, and checked the pH. At room temperature, the pH was about 5.8, so it needed to come down slightly. I added phosphoric acid in two 5 mL increments and a final 10 mL dose (20 mL total), to hit a mash pH of 5.1. I remeasured again after 30 minutes, to see the pH had stabilized at 5.3. This mash at this point had a very milky color in the thin portion, likely due to the high amount of starch.
  • Next, I pulled a 1 gallon volume of thick decoction (most of the liquid drained off), and brought it up to 158° over 10 minutes. I let it sit for another 10 minutes, and then brought it up to a boil while stirring constantly. After a 5 minute boil, I added the decoction back to the mash. This raised the mash temperature to 122.4, a little below my target protein rest of 124°. Owing to this lower mash temperature (due to thermal loss in the mash tun), I increased the volume for the next decoction.
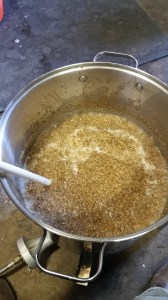
  • Decoction in ProgressI pulled another thick decoction (2 gallons), brought it up to 160°, let it sit for 10 minutes, and then brought it up to a boil. After 5 minutes of boiling, I added this back into the mash.
  • The mash temperature was raised up to 145°, well below my target mash temperature of 154°. So, I added 0.4 gallons of boiling water, which raised the mash temperature to 149°. I then added another 0.4 gallons of boiling water, to raise the mash to 152°. This happened over the course of 20 minutes.
  • After 1 hour, I did an iodine test, and saw full conversion.
  • I pull a third, thin decoction (basically, just mash runnings) of 4.5 quarts, and brought it to a boil for 5 minutes. I added this back to the mash, which raised it to 162°.
  • I stirred, let it sit, and pulled the first runnings. I then added 4.5 gallons of water at 180°, which brought the mash temperature to 170°. I let it sit for 10 minutes, vorlaufed, and collected the second runnings (a portion was left in the mash tun).
  • All told, I collected 7.6 gallons of wort with a preboil gravity of 1.042–84% mash efficiency!
  • After bringing the wort to a boil, I boiled for 90 minutes. Hops, Whirlfloc, and yeast nutrient were added per the schedule in the recipe.
  • After the 90 minute boil, I added the final hop addition and chilled the wort down to 85°. My ground water is fairly warm now, and I had to chill the wort down to pitching temperature overnight anyhow, so I turned off the chiller and transferred the wort to my fermenter.
  • 5 gallons of wort went into the fermenter, with a starting gravity of 1.053.
  • I let the wort sit overnight in my fermentation chamber, to bring it down to pitching temperature. Due to the positioning of the temperature probe, the wort itself only got down to around 65°. It wasn’t ideal, but it was close enough to my pitching temperature (and I didn’t want to let the wort sit any longer). So, I pitched the yeast culture after decanting most of the spent wort. The wort was down to the target temperature within a few hours.
  • This beer was brewed on Thursday, June 2, 2016, and the yeast was pitched on the morning of Friday, June 3, 2016. Subtle signs of fermentation were visible by that evening, and a nice krausen had developed by the following morning (~24 hours later).
  • The fermentation chamber is set for 54°, and I’ll be following the Quick Lager schedule publicized by Brülosophy. At the moment, my plan is to:
    • Ferment at 54° for five days, and check the gravity. If I have passed 50% attenuation, I’ll move on to the next step.
    • Next, raise the temperature to 66° for a week or so.
    • Next, crash the temperature to 34°. When the temperature passes below 50°, I will add gelatin for fining.
    • After 48 hours, I will keg and carbonate, while lagering at around 34°.
  • When I checked the gravity on 7 June 2016, the beer was at 1.028, around 46% apparent attenuation. So, it needs to ferment out a few more days. The temperature was raised up to 66° on 11 June 2016.

What Did I Learn So Far?

  1. Decoction mashing is easier than I thought. This is not to say it is easy necessarily–it’s a lot of work, and adds time, but nothing about the process was really outside my comfort zone or ability. I won’t be doing it for every batch, but I’ll definitely be trying it again.
  2. Decoction mashing is a bit exhausting. It’s a lot of time stirring over a hot kettle, and you really do have to stir continuously. My arm was sore. But, it was worth it!
  3. Temperature targets are hard to hit exactly. I did find–as I had read elsewhere–that I ended up a few degrees shy of my targeted temperatures later in the process. This is probably due to thermal loss in the overall mash. So, I will have to adjust my calculations and take a larger decoction volume for each step. Lesson learned, and easy enough to incorporate next time I decoct!
Honey Fuggle Ale Kegged

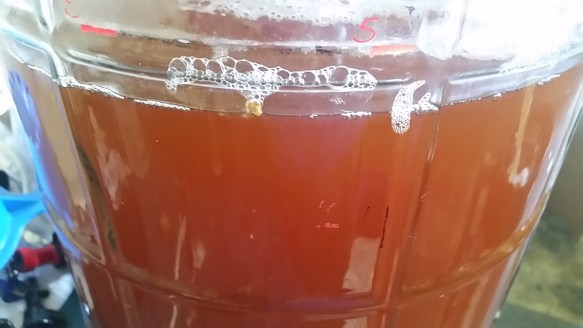
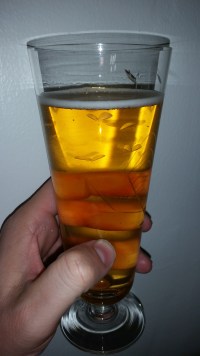
Today I kegged my Honey Fuggle Ale, after 11 days in the primary fermenter. This will definitely be a unique beer, in all of the best ways (I hope). The lightly fruity esters from the yeast and the sweet notes from the honey malt have melded in a way that’s not really common in an American blonde ale. I would bet it’s going to be on the edge of that style, but it’s a blonde ale in my mind still! What’s homebrewing without pushing boundaries?

Time and conditioning will tell how this shapes up. The final gravity was 1.012, down from 1.047, for 4.6% abv.

Honey fuggle ale in the primary fermenter

Beer Tasting: Claremonter Weisse (Me vs. BJCP)

berliner_weisseThis Berliner Weisse was my first award-winning brew! So, I wanted to do my own tasting to see how it compares with the judges’ assessment. It seems like an interesting exercise to calibrate my taste buds, and reflect on how my tasting skills are developing.

  • The Basics
    • Starting gravity = 1.032; final gravity = 1.010; abv = 2.9%; IBU = 5
  • Aroma
    • Low malt, mostly dominated by a tart pear aroma.
    • BJCP Judges
      • “slightly sweet, tart, honey, bready”
      • “Aroma is low lactic, low hop (grassy), lemon, dough (medium), grainy”
  • Appearance
    • Brilliantly clear and pale straw color, with a low white head that thins fairly quickly.
    • BJCP Judges
      • “pale golden, very clear”
      • “Pale yellow, brilliant clear, medium head with medium head retention and medium lacing. Head is white and creamy.”
  • Flavor
    • Pleasantly tart, with a gentle bready character at the back end.
    • BJCP Judges
      • “lemony, tart, wheat, buttery aftertaste, lemon zest, slight diacetyl, clean”
      • “Malt is fresh bread, dough, grainy, lemon tart, all in medium intensity. Nice and clean lactic soureness balanced by malt. Low bitterness. Finish is dry with lingering malt and lactic flavors.”
  • Mouthfeel
    • A fairly thin body and effervescent carbonation, with a dry and crisp finish.
    • BJCP Judges
      • “good mouthfeel, creamy, decent carbonation, could take more”
      • “Light body, medium-high carbonation, light astringency.”
  • Would I brew this again?
    • This is a very nice beer! I’ve noticed that some of the “barnyard” character from initial samplings has receded a bit with age and under cold storage, which isn’t necessarily a bad thing. I can’t say that Berliner Weisse is a style I would always drink, but this has been a tasty experiment that bears repeating.
    • BJCP Judges Overall Impressions
      • “Great beer, could have more aroma, but it’s very pleasant; could lower acidity.”
      • “I enjoyed this beer! It’s highly drinkable, refreshing, still supported by nice malt and lactic sourness that balance with each other. Great example!”
  • Overall
    • 10/10
    • BJCP Judges
      • 39/50
      • 44/50

What Did I Learn?

It’s interesting to compare tastings by various people; on looking them over, I have a few immediate reactions.

First, the overall characters of our assessments overlap pretty broadly. The judges think it’s a good beer, and I think it’s a good beer. The overall style characters–tartness, etc.–are also on everyone’s palates.

For areas of difference, I suspect a few things are going on. First, I wasn’t tasting in the context of a BJCP competition, nor was I tasting in the midst of a flight. I also would bet my beer vocabulary is less developed–or developed in different ways–than the people who judged the entries. For instance, the differences between “doughy” and “bready” are still a bit mysterious to me. A lot of that is perception, of course, and maybe some of it is a bit of over-analysis. In any case, I can certainly do more to refine my vocabulary.

One thing that puzzles me is the judge who saw the entry as slightly undercarbonated–I would suspect that just is from where they saw it in the flight, or maybe pouring technique by whoever was pouring. It is comforting to know that the other judge saw it as well-carbonated, which matches my own perception.

This has been a worthwhile exercise all around. My tastebuds aren’t horribly out of alignment, I can do a little more to develop my vocabulary, and my first attempt at a sour was a success. Time to brew some more!

Beer Tasting: 2016 Orange Summer Wheat Ale

I am many weeks past kicking the keg of my latest orange wheat beer, but fortunately I did a tasting for posterity–on the very last pour for the batch. This recipe has earned its place in my regular rotation!

  • The Basics
    • Original gravity = 1.043; final gravity = 1.010; abv = 4.3%; estimated IBU = 22.
  • Aroma
    • Light orange blossom aroma, absolutely delightful!
  • Appearance
    • There is a moderate haze in the medium-yellow beer. The head is white, medium-fine and of moderate size and decent retention.
  • Flavor
    • The flavor is primarily a low-level of bready maltiness, with a low bitterness and a gentle orange flavor on the finish.
  • Mouthfeel
    • The beer has a light body and moderate carbonation. The finish has a gentle bitterness, but nothing too overpowering.
  • Overall
    • This is a darned fine beer; it hits pretty much every note I was looking for. I am particularly pleased with how the orange came through; just the right amount, without being too far in the background or too much in the front.
  • Overall score: 9.5/10

orange_wheat

Centennial IPA

In preparation for my rather sporadic brewing during the summer months, I’m laying in a store of (filled) kegs for future tapping. Pannotia White IPA is going online shortly, so it seems a good idea to have another IPA waiting in the wings.

I’ve been playing a lot lately in the world of “East Coast IPA’s” (whatever those are), and three things moved me back west for this batch. First, I was getting a bit bored with the East Coast style (even though my recipe is definitely tasty!). Second, my Conan culture seemed to be wandering a bit, and I deemed it wise to dump it. Finally, I wanted to explore some classic hops–a full pound of Centennial hop pellets that recently arrived at my brewery provided incentive.

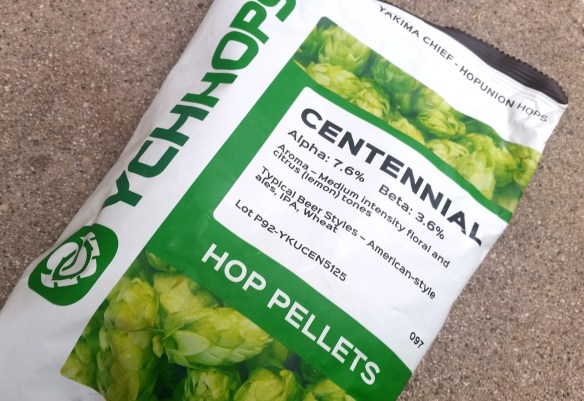
Centennial Hop Pellets

It’s been over three years since my last record of brewing with Centennial, and that seems like a bit of a shame. They are such a classic within the annals of American craft brewing (one of the “3 C’s” along with Cascade and Columbus), and I don’t really know them as well as I should. Time to rectify that with a single-hop brew.

The recipe is modified from one of Gordon Strong’s, in his excellent book Modern Homebrew Recipes. I’ve been really pleased with the beers from the book I’ve done so far, and wanted to try out another one. Ironically, this is his “East Coast IPA”–my main modifications have been in the yeast (Safale US-05 instead of Wyeast 1272 / White Labs WLP051) and also the hopping schedule. Given how the East Coast IPA “style” has developed, I can’t say I would consider his recipe to really be in the spirit of that right now. The hops and yeast are squarely West Coast (in my opinion), although arguably the malt bill could be East Coast (again, whatever that means).

Last year’s crop of Centennial from YCH Hops was on the low end of alpha acids for the variety (7.6% alpha vs. the 7 to 12% alpha considered typical for YCH). So, I modified the timing of the hop additions to get into the ballpark IBU for the recipe. Additionally, I will add a small dry hop charge (1 oz.) upon kegging, just to bump up the hop aroma a touch more.

Centennial IPA

  • 10.5 lbs. 2-row malt (Great Western Malting Co.)
  • 1.75 lbs. Vienna malt
  • 0.5 lbs. Caravienne malt
  • 0.25 lbs. Carahell malt
  • 1 oz. Centennial hops pellets (7.6% alpha, 3.6% beta), first wort hop and 90 minute boil
  • 1 oz. Centennial hops pellets (7.6% alpha, 3.6% beta), 15 minute boil
  • 1 oz. Centennial hops pellets (7.6% alpha, 3.6% beta), 10 minute boil
  • 1 oz. Centennial hops pellets (7.6% alpha, 3.6% beta), 1 minute boil
  • 1 oz. Centennial hops pellets (7.6% alpha, 3.6% beta), 5 minute steep
  • 2 oz. Centennial hops pellets (7.6% alpha, 3.6% beta), dry hop in keg
  • 0.5 tsp. gypsum (added to boil kettle)
  • 1 tsp. Irish moss (10 minute boil)
  • 0.5 tsp. BSG Fermax yeast nutrient (10 minute boil)
  • 1 pkg. Safale American ale yeast (US-05)

Brewing Targets

  • Mash temperature = 149°
  • Original gravity = 1.062 (actual = 1.048)
  • Color = 6 SRM
  • IBU = 59

Procedure

  • I mashed in with 4.3 gallons of water at 160.5°, to hit an initial mash temperature of 150°. The mash was down to 146.8° after 45 minutes.
  • After 60 minutes, I added 1 gallon of water at 200°, which brought the mash temperature up to 156°. I let this sit for 10 minutes, vorlaufed, and collected the first runnings. At this point, the first ounce of hops were in the hop spider.
  • Next, I added 3.75 gallons of water at 185°, to raise the mash bed up to 168°. This sat for 10 minutes, at which point I vorlaufed and collected the second runnings.
  • All told, I collected 7 gallons of wort with a gravity of 1.052, for 76% mash efficiency.
  • I started the boil, adding the hops and other ingredients per the schedule. The wort had boiled down to 6.1 gallons after one hour.
  • After the full 90 minute boil, I removed the hop spider, added the final ounce of hops (in a small hop sack), let it sit for a minute or two, and then started to cool the wort. Once it was down to 75°, I transferred it to the fermenter. I then cooled it down to 68° in the fermentation chamber (which took ~2 hours) and pitched the yeast.
  • I brewed this beer on May 28, 2016. The starting gravity is 1.063, and I am fermenting at 66°.