London Porter

Because I purchased a 55 pound sack of Maris Otter a few months ago, I have been on a bit of an English ale kick. Next stop: porters! I don’t brew this style nearly often enough, especially in its English incarnation. The particular recipe here was modified from the London Porter in Gordon Strong’s Modern Homebrew Recipes. I adjusted the base recipe slightly for the malt brands I had on-hand, and reduced the amount of brown malt slightly to account for my in-house supply. At the end of 2020, I found a bunch of 1 lb. bags of Warminster malts on sale, so loaded up on those for this recipe. I hadn’t used that brand before, and thought a good English malt would be a match for this one.

London Porter

  • 8 lb. Maris Otter ale malt (Crisp)
  • 1 lb. brown malt (Warminster)
  • 1 lb. Crystal 60 malt (Warminster)
  • 0.75 lb. Munich Light malt (Chateau)
  • 10 oz. chocolate malt (Dingemans)
  • 6 oz. Crystal 80 malt (Warminster)
  • 1 oz. Fuggles hop pellets (4.7% alpha), 60 minute boil
  • 1 oz. East Kent Goldings (EKG) hop pellets (5.0% alpha), 10 minute boil
  • 1 Whirlfloc tablet, 5 minute boil
  • 1 pkg. London ESB English Style Ale Yeast (Lallemand)

Target Parameters

  • 1.051 s.g., 1.013 f.g., 5.0% abv, 23 IBU, 27 SRM
  • Full volume infusion mash, 153°; 60 minute boil
  • Claremont water, with 2 g of gypsum to get water profile with 96 Ca, 64 SO4; added Campden tablet to remove chloramines.

Procedure

  • I mashed in with 7.5 gallons of water at 160°, to achieve a mash temperature of 153°. After 60 minutes, I raised the heat to 168° and held it there for 15 minutes before removing the grains.
  • In total, I got 6.45 gallons of runnings with a gravity of 1.043, for 65% mash efficiency. I had used the small-batch adapter ring for my Foundry, because some have anecdotally said it made a difference. I didn’t notice any change, at least for this batch.
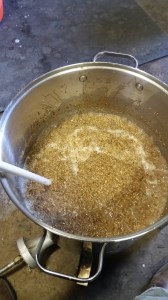
  • I brought the runnings to a boil, adding finings and such per the recipe.
  • After a 60 minute boil, I chilled and transferred to the fermenter.
  • Starting gravity was 1.050, with 5.5 gallons transferred into the fermenter.
  • I brewed this beer on 8 January 2021.
  • I fermented at 66° for the first two days, which was ambient in the garage. The temperature dropped a bit on the third day, so I moved it inside to ~65° on 10 January 2021.
  • I kegged the beer on 24 January 2021, after 16 days of fermentation. Gravity at this point was 1.025, way higher than I expected. I suspect the yeast had crashed out a bit early. I added 3 oz. of corn sugar boiled in 1 cup of water, for carbonation.
  • It seems that the beer kicked off fermentation in the keg again, because gravity measured 1.020 on 4 February, when I checked it again. That works out to 4.0% abv.

Tasting

  • Appearance
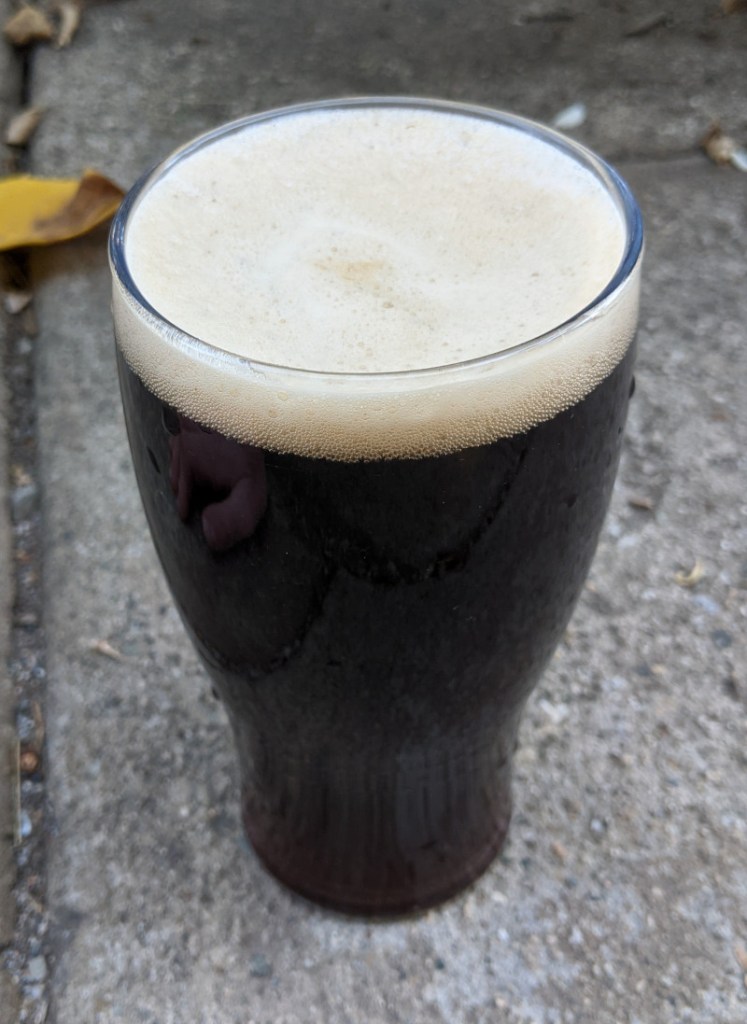
    • The beer pours with a thick tan head that subsides moderately quickly, with good retention. The beer itself is dark brown, with a fair bit of yeast haze. I’m pretty disappointed with the lack of clarity…I suspect this is due in part to the ESB yeast (which has given me issues previously), and a potentially stalled fermentation that kept things in suspension longer than usual.
  • Aroma
    • There is a roasty toasty malt character at the forefront–really nice. The hop character is slightly earthy, with a low level of dried stone fruit (?cherry) in the yeast character.
  • Flavor
    • The beer has a roasty, slightly nutty flavor, with a medium-high level of maltiness. The balance is tilted towards the malt, with a medium-low bitterness on the back end. The beer brings out a bit of a caramel character along with an interesting dried stone fruit character as it warms up in the glass. There is a very slight sweetness, as well as a subtle licorice character.
  • Mouthfeel
    • Medium-full body, with medium-low carbonation.
  • Would I Brew This Again?
    • This is a good enough beer, but not fully to my tastes. The malt and hop character are pretty great (I would use Warminster malts again for any English beer!), but the yeast was a complete disappointment. I am fairly shocked that it was still in suspension nearly 6 weeks after kegging and conditioning in the keg. I probably should have used a bit of gelatin earlier in the process; but that’s just not typical for my dark beers! I might make this recipe again, but would probably stick with Nottingham or something that clears up a bit more quickly.
  • Overall
    • 6/10 (main deductions for clarity)

Beer Tasting: Lithographica Pilsner

The keg for my Bohemian pilsner is long past kicked, but better late than never, right?

  • The Basics
    • Original gravity = 1.053; final gravity = 1.011; abv = 5.5%; estimated IBU = 39
  •  Aroma
    • Light bready aroma, with a moderate spicy hops note. I might detect a very, very faint fruitiness, but this seems to come and go, so I’m not certain it is really there.
  • Appearance
    • Clear, but not brilliant, with a moderate yellow color. The head pours rather high when first poured, but settles down to a low head with good coverage. The head is fine and white.
  • Flavor
    • A moderate hoppiness is at the fore, moderately balanced against a decent but not overwhelming maltiness. The malt has a bready/grainy character. As I drink this, the hoppiness fades out nicely on the finish.
  • Mouthfeel
    • This is a beer with modest body and a medium rather than dry finish. Carbonation is moderately high.
  • Would I brew this again?
    • This beer is a pretty respectable first go at a Bohemian pilsner. It’s quite drinkable, and there isn’t anything I would call a major flaw. If I do this recipe again, I would up the maltiness a touch, darken the color to more gold than yellow, and work on improving the clarity just a little. Clarity could be fixed by more careful racking, and a little bit more time lagering before initial tapping. For increased maltiness, I might add another grain or two to the malt bill (e.g., Carapils), or else boil the decoctions for a longer stretch. This would also help burnish the color to the golden sheen that is more appropriate for the style.
  • Rating
    • 6/10

Lithographica Pilsner

Hobbies have a way of sneaking up on you. My homebrewing started in earnest nearly eight years ago, when I bought some basic equipment and ingredients for a red ale. For the next few years, things chugged along with various recipes–all extract-based, and some pretty decent. Then I moved into a larger place with a dedicated garage and utility sink, and before I knew it I was expanding to full volume boils and all-grain batches. Add in temperature-controlled fermentation and a kegging setup, and things have really taken a turn for the serious.

When I started brewing, each of those subsequent technique and equipment additions were unimaginable. I didn’t have space for many things, and it was taking a good bit of energy to keep on top of the very basics of sanitation, wort chilling, and bottling. Techniques like all-grain brewing seemed like way too much hassle for my time and available facilities. Then, I got practiced, and I got space. As the basics started to become second nature, they also got a little mundane. I wanted some spice in my brewing life, and suddenly all-grain brewing didn’t seem so intimidating after all. I added all-grain brewing to my tool-kit, and have spent more than two years learning and perfecting that. Many aspects of the process are second nature now…which means I’m in a headspace where I can think about adding even more tools to my brewing toolkit.

And here I am staring down at decoction mashing.

Pilsner Malt

Decoction mashing is a long, intimidating process, and quite frankly unnecessary in many cases. Yet, it is also a deeply traditional part of brewing, and for some malts and some recipes may indeed add a bit of flavor and body not possible with infusion mashes.

I recently decided to do another pilsner, and a Bohemian pilsner seemed like a good match. I researched and designed a recipe, aiming to incorporate authentic Bohemian ingredients wherever possible. It was quite a brew day–nearly eight hours–but worth the experience and hopefully worth the beer.

I chose the name “Lithographica Pilsner” owing to a special connection between paleontology and brewing; more on this in an upcoming post!

Lithographica Pilsner

  • 10 lbs. Floor-Malted Bohemian Pilsner malt (Weyermann)
  • 3 oz. Saaz whole hops (2.7% alpha), 60 minute boil
  • 1 oz. Saaz whole hops (2.7% alpha), 30 minute boil
  • 1 oz. Saaz whole hops (2.7% alpha), 10 minute boil
  • 1 oz. Saaz whole hops (2.7% alpha), 5 minute steep
  • Pilsner Lager Yeast (WLP800, White Labs), prepared in starter
  • 1 Whirlfloc tablet (10 minute boil)
  • 0.5 tsp. yeast nutrient (10 minute boil)

Saaz Hops

Procedure

    • Four days in advance, I prepared a 2.25L yeast starter, with 233 grams of dry malt extract. I ran it for two days until it fermented out, and then cold-crashed it until it could be decanted and pitched.
    • I used two 4.5 gallon volumes of water — 4.5 gallons for the mash, and 4.5 gallons for the sparge. Each 4.5 gallon measure started as distilled water, with 0.5 g of calcium chloride.

Mash during the acid rest.

Mash during the acid rest.

  • I added 11 quarts of water at room temperature, to hit the dough-in temperature of 72°. I let this sit for 30 minutes, before proceeding to the next step.
  • Next, I added 1.6 gallons of water at 176°, to hit the acid rest temperature of 105°. I let this sit for 10 minutes, and checked the pH. At room temperature, the pH was about 5.8, so it needed to come down slightly. I added phosphoric acid in two 5 mL increments and a final 10 mL dose (20 mL total), to hit a mash pH of 5.1. I remeasured again after 30 minutes, to see the pH had stabilized at 5.3. This mash at this point had a very milky color in the thin portion, likely due to the high amount of starch.
  • Next, I pulled a 1 gallon volume of thick decoction (most of the liquid drained off), and brought it up to 158° over 10 minutes. I let it sit for another 10 minutes, and then brought it up to a boil while stirring constantly. After a 5 minute boil, I added the decoction back to the mash. This raised the mash temperature to 122.4, a little below my target protein rest of 124°. Owing to this lower mash temperature (due to thermal loss in the mash tun), I increased the volume for the next decoction.
  • Decoction in ProgressI pulled another thick decoction (2 gallons), brought it up to 160°, let it sit for 10 minutes, and then brought it up to a boil. After 5 minutes of boiling, I added this back into the mash.
  • The mash temperature was raised up to 145°, well below my target mash temperature of 154°. So, I added 0.4 gallons of boiling water, which raised the mash temperature to 149°. I then added another 0.4 gallons of boiling water, to raise the mash to 152°. This happened over the course of 20 minutes.
  • After 1 hour, I did an iodine test, and saw full conversion.
  • I pull a third, thin decoction (basically, just mash runnings) of 4.5 quarts, and brought it to a boil for 5 minutes. I added this back to the mash, which raised it to 162°.
  • I stirred, let it sit, and pulled the first runnings. I then added 4.5 gallons of water at 180°, which brought the mash temperature to 170°. I let it sit for 10 minutes, vorlaufed, and collected the second runnings (a portion was left in the mash tun).
  • All told, I collected 7.6 gallons of wort with a preboil gravity of 1.042–84% mash efficiency!
  • After bringing the wort to a boil, I boiled for 90 minutes. Hops, Whirlfloc, and yeast nutrient were added per the schedule in the recipe.
  • After the 90 minute boil, I added the final hop addition and chilled the wort down to 85°. My ground water is fairly warm now, and I had to chill the wort down to pitching temperature overnight anyhow, so I turned off the chiller and transferred the wort to my fermenter.
  • 5 gallons of wort went into the fermenter, with a starting gravity of 1.053.
  • I let the wort sit overnight in my fermentation chamber, to bring it down to pitching temperature. Due to the positioning of the temperature probe, the wort itself only got down to around 65°. It wasn’t ideal, but it was close enough to my pitching temperature (and I didn’t want to let the wort sit any longer). So, I pitched the yeast culture after decanting most of the spent wort. The wort was down to the target temperature within a few hours.
  • This beer was brewed on Thursday, June 2, 2016, and the yeast was pitched on the morning of Friday, June 3, 2016. Subtle signs of fermentation were visible by that evening, and a nice krausen had developed by the following morning (~24 hours later).
  • The fermentation chamber is set for 54°, and I’ll be following the Quick Lager schedule publicized by Brülosophy. At the moment, my plan is to:
    • Ferment at 54° for five days, and check the gravity. If I have passed 50% attenuation, I’ll move on to the next step.
    • Next, raise the temperature to 66° for a week or so.
    • Next, crash the temperature to 34°. When the temperature passes below 50°, I will add gelatin for fining.
    • After 48 hours, I will keg and carbonate, while lagering at around 34°.
  • When I checked the gravity on 7 June 2016, the beer was at 1.028, around 46% apparent attenuation. So, it needs to ferment out a few more days. The temperature was raised up to 66° on 11 June 2016.

What Did I Learn So Far?

  1. Decoction mashing is easier than I thought. This is not to say it is easy necessarily–it’s a lot of work, and adds time, but nothing about the process was really outside my comfort zone or ability. I won’t be doing it for every batch, but I’ll definitely be trying it again.
  2. Decoction mashing is a bit exhausting. It’s a lot of time stirring over a hot kettle, and you really do have to stir continuously. My arm was sore. But, it was worth it!
  3. Temperature targets are hard to hit exactly. I did find–as I had read elsewhere–that I ended up a few degrees shy of my targeted temperatures later in the process. This is probably due to thermal loss in the overall mash. So, I will have to adjust my calculations and take a larger decoction volume for each step. Lesson learned, and easy enough to incorporate next time I decoct!