Alta California Lager 2026

I’ve enjoyed my Mexican-style pale lager recipe over the years, which has followed the same core ingredients but with variations in how I handle the corn. This includes either flaked corn directly in the mash or grits in a cereal mash. The latter is a lot of work, but opens up varieties of corn and subtle flavors not possible with the standard flaked ingredients. So, I aimed for the extra effort of a cereal mash on this iteration.

This particular batch was brewed to celebrate the major accomplishment of a friend who defended her master’s thesis (I served on her committee as a outside member, too). She had shared that even though she’s not really a beer person, the original version of this recipe was a favorite of hers. That was all the excuse I needed to return to the cereal mash!

Alta California Lager 2026

  • 5.75 lb. Synergy Select pilsen malt (Briess)
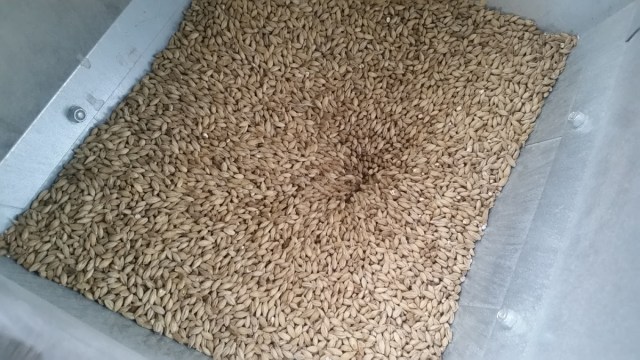
  • 2 lb. white corn grits (Palmetto Farms)
  • 1.75 lb. Vienna malt (Weyermann)
  • 0.5 tsp. BrewTanB, added to mash
  • 0.4 oz. Magnum hop pellets (12.3% alpha), 60 minute boil
  • 0.5 tsp. BrewTanB, 10 minute boil
  • 1 Kick carrageenan tablet
  • 1 oz. Saaz hop pellets (2.4% alpha), 5 minute boil
  • 0.5 tsp. WLN1000 yeast nutrient (White Labs), 5 minute boil
  • 2 pkg. Diamond Lager yeast (Lallemand)

Target Parameters

  • Infusion mash, with 75 minutes at 148°, and 10 minutes at 168°, with cereal mash at first step; full volume mash
  • 1.044 o.g., 1.006 f.g., 5.0% abv, 21 IBU, 3 SRM
  • Water built from RO, to hit 20 ppm Ca and 35 ppm Cl
  • 5 gallon batch

Procedure

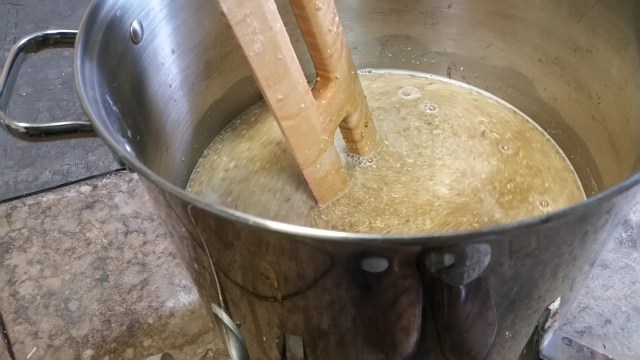
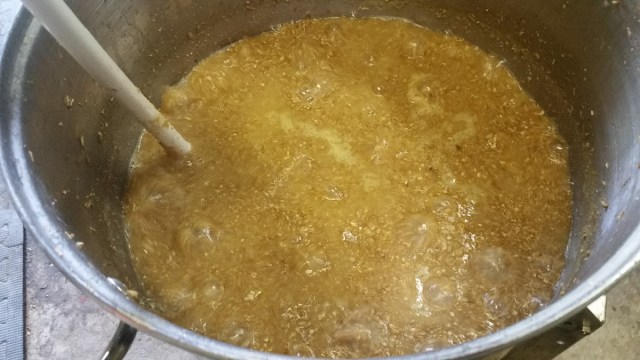
  • The first step in the process was a cereal mash. I had intended 0.5 lb. of pilsner malt (as did in my first batch), but mismeasured and had 1 lb. instead. I combined ~0.75 gallons of RO water with the corn grits and pilsner malt, heating the mixture on the stove to 158°. I held the mash here for 10 minutes, before bringing everything to a boil. During a 30 minute boil, I added another 0.5 gallons or so of RO water.
  • In my Anvil Foundry, I started with 6.25 gallons of water, to which I added 1.5 grams of calcium chloride. I heated this to 140°.
  • During the last 7 minutes or so of the cereal mash, I mashed in the rest of the grains to hit a temperature of ~130° degrees. Then, a few minutes later, I added the boiling cereal mash. This heated the entire mash to around 145°, and then I added heat via the Anvil heating element to get up to 148°. I added 2 tbs. of 10% phosphoric acid to adjust pH.
  • I held the mash at 148° for 75 minutes, before raising to 168° for 10 minutes.
  • At the end of the mash, I pulled the grains. The runnings came out to 6.56 gallons at a gravity of 1.038, for 73% mash efficiency.
  • I heated the runnings to a boil, adding hops and finings per the recipe. At the end of the 60 minute boil, I turned off the heat and chilled the wort to 74°, before transferring to the fermenter. I chilled the fermenter the rest of the way in the fermentation chamber, down to 50°. 12 hours after the initial transfer, I pitched the yeast directly.
  • I brewed this beer on 9 April 2026. Starting gravity was 1.045.
  • The fermenter was held at 52° for fermentation, and it was cold crashed to 34 degrees on 4 May 2026. I kegged the beer on 9 May 2026, using a semi-closed transfer. The beer was slightly hazy at this point, with a very slight fruity aroma (corn?).
  • Final gravity was 1.007, for 5.1% abv.
Tasting

  • Appearance
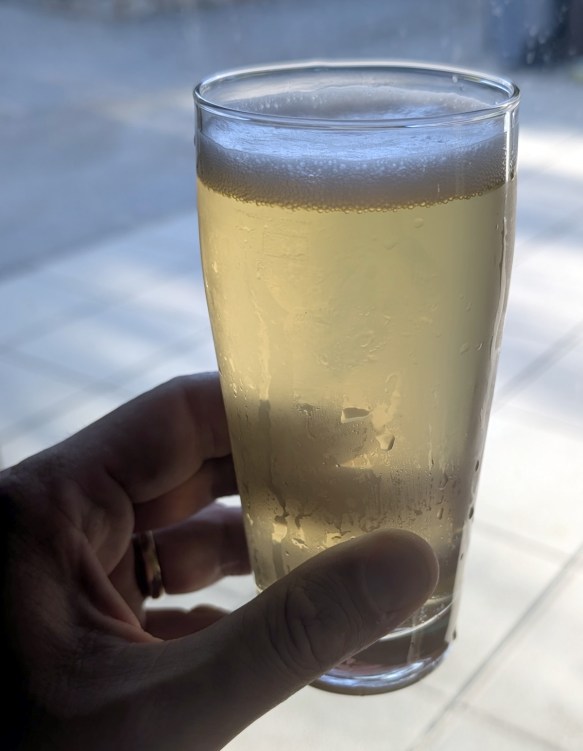
    • Light straw yellow beer, with a modestly persistent white head. There is a very slight haze to this, which is annoying (especially given how long it has been lagering).
  • Aroma
    • The beer has a gorgeous aroma, with a light cracker and corn character. No hop aroma to speak of, nor is there any yeast character that I pick up.
  • Flavor
    • Medium-low cracker-like malt flavor, with a hint of corn sweetness. Medium-low bitterness, clean fermentation profile. Evenly balanced.
  • Mouthfeel
    • Light bodied, crisp mouthfeel, medium-high carbonation.
  • Would I Brew This Again?
    • This is an incredibly tasty and very drinkable beer; it hits pretty much all of the flavor and aroma notes I was hoping for. The sensory contribution from the corn is subtle, but absolutely perfect. I love this recipe! The only minor annoyance is the persistent haze. I need to figure that out in my next batch, because it has been a perpetual issue in most iterations of the recipe. Maybe I need to change water chemistry, and increase the calcium chloride dose? At a minimum, I should hit the keg with a clarifier next time.
    • Serving mod: my friend tells me that the beer is delicious with chamoy and tajin on the rim. Now I have to try this!
  • Overall
    • 8/10

Equipment Review: Mash Paddle by Abbey Cat Brewing

My wife got me a mash paddle for Christmas! I had a nice plastic brewing spoon already, and awhile back I had also purchased a plastic mash paddle. The spoon is great, but the plastic mash paddle was fairly worthless. It had a little too much flexibility and was just a little too small to be effective in breaking up dough balls or stirring decoctions. As a result, my arms would be quite sore after even a brief decoction, so I mainly just ended up using the plastic spoon. A new, sturdier mash paddle was a welcome addition to my brew house.

20161228_164521

This particular mash paddle was made by Abbey Cat Brewing–it’s their 36″ maple version. The construction is high quality–there is a beautiful grain on the wood, the piece is shaped nicely, and all of the edges were cleanly sanded. This particular version has my brewery name engraved into it, which is a nice touch.

I’ve used the paddle for a few batches now, on tasks including dough-in, stirring of the mash, and decoction stirring. The paddle works pretty much as advertised, and is head-and-shoulders above my old plastic paddle. I could probably have gotten away with the smaller (24″) version, but overall it’s probably better to have a paddle that’s too big than too small. When it comes to decoctions, the paddle is way easier to work with than my spoon, too. It moves more of the decoction around, with less effort. Clean-up is easy, too — just a quick rinse and I’m done!

So, I give this piece of equipment a solid A, for quality of construction and utility. I’d recommend it for anyone who is doing regular all-grain brewing, and say it is a “must have” for anyone doing decoctions.

Mash paddle in action for a decoction

Mash paddle in action for a decoction

Decoction Envy Vienna Lager

Continuing my exploration of Vienna malt, I turned my sights onto the most Viennese of all Vienna malt-based brews: Vienna lager. This is my first time with the style, and only my third time brewing a lager beer, so I did a fair bit of research to flesh out the basics for this batch.

My recipe was modeled primarily on “Nothing But Vienna” from Gordon Strong’s Modern Homebrew Recipes. As the name implies, Strong’s recipe was a SMaSH, which appealed to me as a way to delve as deeply as possible into the mysteries of Vienna malt. The recipe from Modern Homebrew used a decoction mash to develop the rich amber color characteristic of the Vienna lager style, which meant a great chance for me to expand my techniques!

Vienna Malt

Once I had a base recipe in mind, I couldn’t resist the urge to modify it. Some of this was based on necessity, and some of this was based on my own inclination. The original brew called for whole Sterling hops; pellets were easier to track down. I also elected to use dry yeast, both for simplicity as well as to give dry lager yeast a try (in this case, the well-reviewed Saflager W34/70). Finally, I knew that I wanted to build up some water for this, but Strong’s water suggestion (RO water with just a bit of calcium chloride augmented by phosphoric acid) also departed from the “traditional” recommendation of a profile that matched some wells in Vienna itself (as listed in Noonan’s classic work). So, I modified that a bit too.

Based on my previous experience with a decoction mash, I knew that hitting mash temperatures after decoction additions was going to be a challenge. So, I adjusted all of my decoction volumes up. I got some assistance from the BeerSmith software on this. What I did was tinker with the step temperatures a bit. Let’s say my first mash step was at 144°, and my next step aimed for 150°. I knew that the mash would slip a bit below 144°–let’s say 138°–while I was doing the decoction. So, after I had the volumes for the 144° step, I changed the temperature target for that step to 138° (or whatever I thought the mash would end up at). I left the temperature for the next step the same. So, even though I was actually going for a 144°->150° mash temperature boost after the decoction, I told the software I was going for a 138°->150° boost. This upped the calculated decoction volume accordingly. As noted below, I ended up closer to my mash targets, but still not quite there yet. The main issue is that my temperature drop was more than expected, probably due to cooling in the mash tun as I strained out each decoction volume. Something to adjust for next time!

All in all, this was one of the most technically demanding (and fun!) brew sessions I’ve done to date. Here’s hoping the results match the effort!

Decoction mash in progress

Decoction mash in progress

Decoction Envy Vienna Lager

  • Distilled water, adjusted as outlined below
  • 10.5 lbs. Vienna malt (Weyermann)
  • 0.9 oz. Sterling hop pellets (8.1% alpha), 60 minute boil
  • 0.1 oz. Sterling hop pellets (8.1% alpha), 10 minute boil
  • 1 Whirlfloc tablet, 10 minute boil
  • 0.5 tsp. yeast nutrient (BSG Fermax), 10 minute boil
  • 2 pkg. Saflager yeast (W34/70)

Brewing Targets

  • Double decoction mash, with 20 minutes at 144°, 20 minute boil of decoction and raise mash to 154°, 20 minute boil and raise mash to 168°
  • Original gravity = 1.052 (actual = 1.055)
  • Color = 5 SRM (probably a bit higher due to decoction)
  • IBU = 29
  • 90 minute boil total

Procedure

  • To 6 gallons of distilled water, I added 5.1 g of gypsum, 1.5 g of calcium chloride, 5.4 g of chalk, and 1.5 mL of 10% phosphoric acid, to approximate the Vienna water profile. I note that the chalk didn’t really dissolve much, so for future brews I’m not really sure if this is a worthwhile addition.
  • I mashed in with the water at 151°, to hit a mash temperature of 145°. The mash at this point is quite thin.
  • After 25 minutes, I withdrew 5.5 quarts of thick mash, raised the temperature to 158°, let the mash sit for 15 minutes, and then boiled for 20 minutes.
  • I added the decoction back to the mash tun, which raised the mash temperature to 147°.
  • After 15 minutes, I removed 2.675 gallons of thick mash, raised it to 158° for 15 minutes, and then boiled for another 20 minutes. I added this back to the mash tun, which raised the overall mash up to around 150°.
  • After 10 minutes, I vorlaufed and drained the mash tun. I added 4 gallons of sparge water (adjusted with phosphoric acid and other minerals to match the Vienna profile) at 190°, which raised the mash water to 174° or so, but put the mash bed at 170° on the dot. After a few minutes, I collected the remaining wort.
  • Overall, I collected 8 gallons of wort with a starting gravity of 1.045. Wow! The efficiency was through the roof at 89%. To compensate for the high volume, I decided to boil down the wort for 30 minutes before adding the hops.
  • After 30 minutes of a very vigorous boil, the wort volume was down to 7.3 gallons and 1.049 gravity. After 60 minutes or so of boiling, we were at 6.5 gallons with a gravity of 1.053. At this point, I dialed back the boil a bit, so that I wouldn’t overshoot my target gravity. At 8 minutes to go, I added .25 gallons of tap water (with Campden tablet shaving) to lower gravity a bit; prior to this, the gravity was at 1.055 and thus the absolute outside limit of the Vienna lager style. The water addition brought it down to 1.053.
  • I added all hops and other additions per the recipe, with a total 90 minute boil.
  • At the end of the boil, I turned off the heat and cooled the wort down to 80°. At this point, I transferred it to my fermentation chamber and set it to cool to 55°.
  • Once the wort reached 55°, I sprinkled the yeast into the fermenter.
  • I brewed this beer on 3 September 2016. Visible signs of fermentation were apparent by the next morning.
  • I’ll be fermenting at 55° for 10-14 days, before raising the beer up to 68° for a diacetyl rest. After a few days of that, I’ll crash the beer to around 32° for a few days and then transfer to the keg.