Equipment Review: Mash Paddle by Abbey Cat Brewing

My wife got me a mash paddle for Christmas! I had a nice plastic brewing spoon already, and awhile back I had also purchased a plastic mash paddle. The spoon is great, but the plastic mash paddle was fairly worthless. It had a little too much flexibility and was just a little too small to be effective in breaking up dough balls or stirring decoctions. As a result, my arms would be quite sore after even a brief decoction, so I mainly just ended up using the plastic spoon. A new, sturdier mash paddle was a welcome addition to my brew house.

20161228_164521

This particular mash paddle was made by Abbey Cat Brewing–it’s their 36″ maple version. The construction is high quality–there is a beautiful grain on the wood, the piece is shaped nicely, and all of the edges were cleanly sanded. This particular version has my brewery name engraved into it, which is a nice touch.

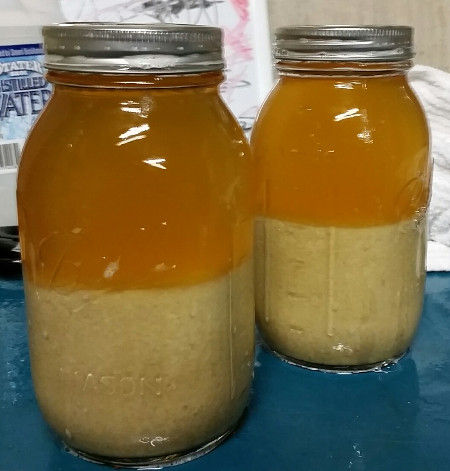
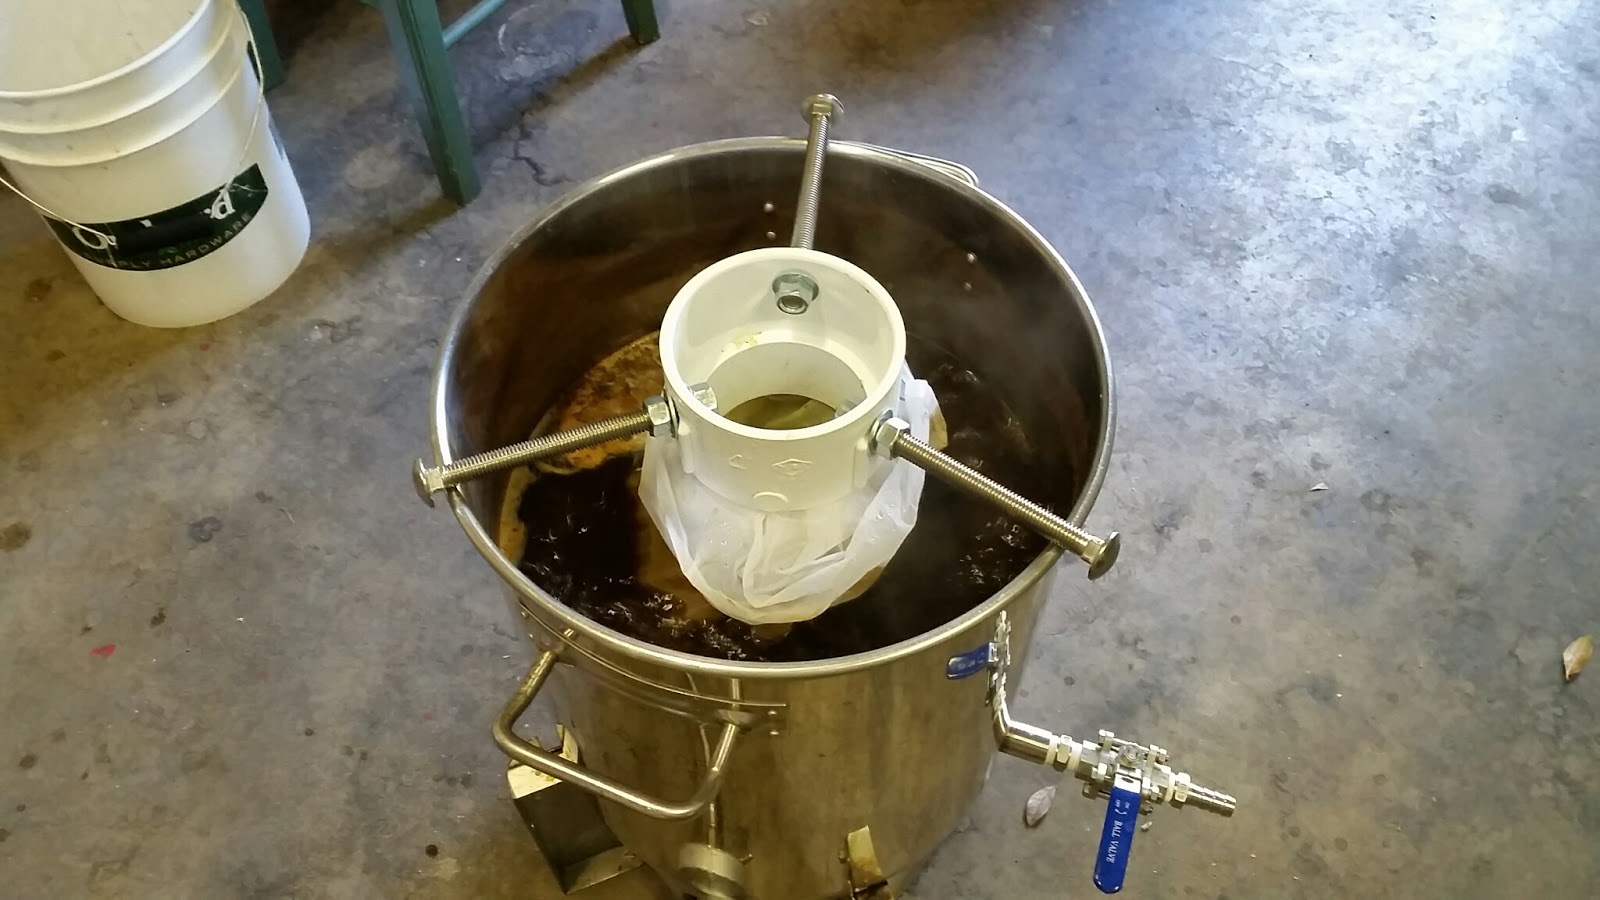
I’ve used the paddle for a few batches now, on tasks including dough-in, stirring of the mash, and decoction stirring. The paddle works pretty much as advertised, and is head-and-shoulders above my old plastic paddle. I could probably have gotten away with the smaller (24″) version, but overall it’s probably better to have a paddle that’s too big than too small. When it comes to decoctions, the paddle is way easier to work with than my spoon, too. It moves more of the decoction around, with less effort. Clean-up is easy, too — just a quick rinse and I’m done!

So, I give this piece of equipment a solid A, for quality of construction and utility. I’d recommend it for anyone who is doing regular all-grain brewing, and say it is a “must have” for anyone doing decoctions.

Mash paddle in action for a decoction

Mash paddle in action for a decoction

Recirculating Draft Line Cleaner: Pin Lock Edition

Most of us who own kegging setups probably don’t clean our draft lines as often as we should (if ever). For me, the big deterrent has been that the procedures require either 1) wasting a bunch of CO2 to push cleaning solution out of a keg or 2) specialized, somewhat costly, and unwieldy equipment. So, I was really excited awhile back to read a post on Homebrew Finds about a DIY draft line cleaner. It looked cool, but the default build was for a ball lock keg. I use pin locks, and the alternative suggestions they had for pin locks assumed quick disconnects on the draft lines, which I don’t have. So, I needed to do some minor tweaking. Fortunately, the original post gave plenty of specifics for the base build, and a little research helped me put together my own pin lock recirculating draft line cleaning system.

The basics are the same as outlined at Homebrew Finds; the only minor change is in the hardware connecting the pump to the beverage lines. Parts include:

The cost for everything was roughly $45 (the main costs were in the pump and power switch).

20160816_181051

Bushing, Tube Fitting, and Keg Post

Once I had everything, I assembled the parts, using teflon tape to seal the threads. First I connected the bushing+tube fitting+keg post (in that order).

20160816_182222

Assembled Hardware

Then, I attached that assembly to the pump. Everything fit perfectly!

20160816_194706

Hardware Attached to Pump

Now, I was ready to go! I attached the silicone tubing to the beer faucet, connected the beer line to the pump, and pushed some hot water through to clear the beer out of the line. After this, I ran line cleaner for 20 minutes, recirculating the cleaner by draining it out of the faucet and back into the bucket with the pump.

20160816_195802

Once this was done, I rinsed out the line by running hot tap water through the entire assembly for another 20 minutes. Done, and done!

20160816_195754

So far, I’m pretty happy with this setup, and anticipate that it will reduce my excuses for not cleaning my tap lines more frequently. This will in turn lead to tastier draft homebrew!

A big thanks to the folks at Homebrew Finds for posting such a clear and easily modified tutorial. You made my own build that much easier!

Safety note: Please use good judgement and be aware of all manufacturer warnings and safety protocols for this equipment. Be smart, be safe!

2015’s Homebrew Highlights

My beer of the year, Citra Blonde Ale

Looking back, 2015 was a banner year for my brewing. Speaking immodestly, I produced some excellent beers. Just as importantly, if not more so, I really stretched myself in terms of new styles and techniques.

  • Favorite Batch
    • Citra Blonde Ale
      • This blonde ale nailed every single aspect–in fact, I might say it is one of the best beers I’ve brewed over the years.
  • Least Favorite Batch
    • I didn’t have any batches that totally went south, but I did have some that were just not quite where I wanted them. My Live Long and Porter was squarely mediocre, as was my attempt at an Old Speckled Hen Clone. The former was mostly a result of recipe–the latter was, at least in part, the need to age for way longer than I was willing to give it.
  • Experimental Recipe with Most Potential
    • Pannotia White IPA
      • I’ve done two iterations of this recipe now, and each time have dialed it in just a little closer to my overall goals. One more, and I think I should have it where I want it! This is my “brew to watch” for 2016.
  • Most Fun New Style/Recipe to Try
    • Berliner Weisse
      • I’ve long been hesitant to brew a sour beer (and truth be told, I think that sours are a bit overdone), but I couldn’t pass up a chance to try kettle souring. It was super easy, and the result has been pretty tasty!
  • Best Technique Added to Repertoire
    • I tried a lot of new things this year (different hopping schedules, session IPA’s, kettle souring, brew-in-a-bag, and oaking, to name a few), but I think the biggest addition to my toolkit has been kegging. I absolutely love the convenience–so much less scrounging, scrubbing, and sanitizing–and it also makes hosting people easier (no more piles of bottles on the counter). I’ll admit that the “cool factor” of a few taps on-hand is nice, too. It’s nice to be able to just have a few ounces if that’s all I want, rather than committing to a full 12, 18, or 22 ounce bottle. A win all around!
  • Most Frustrating Technique/Tool to Master
    • I would say that mastering my refractometer has been among the most frustrating aspect of brewing this year. It is a handy little tool, but wow, is the scale off major time. It took quite a few iterations and the development of an instrument-specific equation to get it to the point where I feel comfortable with it.
  • Best Ingredient Added to Repertoire
    • I have to say that WLP400, White Labs’ Belgian Wit yeast, is probably one of the most enjoyable strains to work with, in terms of quality of the results. I’ve used it in both of my White IPA batches, and I’m hooked.
  • Favorite Book
    • Hands down, it’s Gordon Strong’s Modern Homebrew Recipes. Every single recipe I’ve tried or modified from there has been excellent. It has also helped me to really think about my process, and the effects that process can have on each batch (e.g., late hopping, adding dark grains at the vorlauf, etc.). A close runner-up is Mastering Homebrew by Randy Mosher. Not only is it informative, but it’s got the best (and most helpful) graphics of any homebrew book I’ve seen yet. Strong’s book has pushed my technique the most, but Mosher’s has solidified the basics the most. They are a good duo of publications!

Packrat Porter

Yeast sludge settling out

I’m always interested in expanding my skills and homemade brewing equipment, and it seemed like an opportune time to take a big step forward. I’ve been curious about washing and reusing yeast for some time, but just haven’t made the effort to enact the process. So, when I kegged my Seven Seas Session IPA, I saved the sludge from the bottom of the primary fermenter. I added a bit of boiled and cooled water, and then decanted the slurry into two quart mason jars. Each jar was about 2/3 full (a little too full, in retrospect), and I then topped each up with more cooled and boiled water. I let them sit for awhile, and then decanted the liquid as well as the top layer of sludge into another quart jar. This, too, was topped up with water and then placed in the fridge for a week. Last night, in preparation for today’s batch, I prepared a 1L yeast starter and added the yeast from the bottom of the jar. This stirred overnight and into the afternoon, at which point I was ready to pitch the yeast. The starter looks and smells quite healthy, so I’m optimistic about this little experiment. Next time, I may instead overbuild a primary yeast culture and save that, instead of reusing yeast from a previous batch.

I also decided to try adding the dark grains and crystal malts during the vorlauf, following a technique suggested by Gordon Strong in his recent homebrew recipes book. This was a little tricky when it came time to calculate the various water volumes required, and I missed the target by a little bit (I had done the calculations without the various crystal malts, and I also presume the oats soaked up a bit of extra water). I improvised by washing the grains at the end with a final pulse of water, and that brought me right to my volume and gravity target. Lesson learned!

The final major addition to today’s brew process was the construction of a hop spider. I essentially followed directions from BYO magazine, but instead used a food-grade straining bag instead of a paint-straining bag. It worked quite well during the boil, and will definitely be easier than wrangling multiple bags during more hoppy brews.
Today’s brew was an American(ish) porter, named in honor of a resident of our quarry this summer. It was also appropriately named as the dumping ground for a whole bunch of leftover ingredients and free samples, as well as my first attempt at yeast washing. I am under no illusions that some of the smaller grain additions will have a detectable effect, but I can’t stand the idea of throwing out those little packets, either! Given my experience with the last porter I brewed, which was a touch thin, I beefed up the recipe with a pound of flaked oats.
Packrat Porter
  • 8.55 pounds 2-row malt (Great Westerning Malting Co.)
  • 1 lb. flaked oats
  • 1.4 oz. Borlander Munich Malt (Briess)
  • 1.4 oz. Victory malt (Briess)
  • 1 lb. chocolate malt, added at vorlauf
  • 0.75 lb. 60° caramel Munich malt (Briess), added at vorlauf
  • 0.37 lb. 40° crystal malt, added at vorlauf
  • 1.4 oz. 60° caramel malt (Briess), added at vorlauf
  • 1 oz. Newport hops (10.7% alpha), 60 minute boil
  • 1L starter of English ale yeast, WLP002 (reused)
  • 1 tbs. 5.2 pH stabilizer (in mash)
  • 1 tablet Whirlfloc (10 minute boil)
Procedure
Hop spider in action
  • I mashed in with 3.1 gallons of water at 168°, which stabilized to around 155°. The mash had dropped to 152° after 60 minutes.
  • After 60 minutes, I added the dark and crystal grains, as well as 1.27 gallons of water at 185°. I let this sit for 15 minutes, vorlaufed, and collected 3.15 gallons of wort. Then, I added 3.65 gallons of water at 180°, which raised the mash bed to 164°. I let this sit, vorlaufed, and collected the remainder of the wort. This totaled 6.1 gallons at a gravity of 1.046. This was a little under my target on both counts, so I added 0.75 gallons of water at 120°. I drained this for the final collection.
  • All told, I collected 6.75 gallons of wort with a gravity of 1.048. This works out to 75% efficiency.
  • Once the wort came to a boil, I added the hops and boiled for 60 minutes. With 10 minutes to go, I added the Whirlfloc.
  • At flame-out, I chilled the wort down to about 80 degrees and then transferred it to the carboy. I placed it in the fermentation chamber and cooled it for an hour or so, and then pitched the yeast.
  • Starting gravity was 1.056, which should result in a final abv of around 5.1%. The unfermented wort has a nice dark color and a good taste. I plan to ferment this for 2 weeks at 68°.

DIY Stir Plate

Stir plate in action

As I continue to expand my home microbiology lab, a stir plate seemed like a logical addition. Good laboratory grade ones are reliable, but expensive ($75 on up). Cheap kits and cheaply made stir plates are easy to find on-line, but often only have middling reviews. So, I decided to make my own.

Not being an electrical engineer, I wasn’t entirely in love with the idea of soldering wires and the like, so I elected to use one of the builds that modifies a computer cooling fan. A project posted at Homebrew Finds gave basic directions, some designs for a 3D printed magnet mount, and a list of parts easily found on Amazon. A little more searching on Thingiverse found this base for the Ehrelenmeyer flask, which I shrank slightly in the Z-axis (subtracting ~5 mm, but leaving the X and Y dimensions unchanged) before printing in order to move the magnets closer to the stir bar. I also added some silicone feet under the fan, to give a little air circulation as well as to prevent movement of the stir plate when in use.

Parts list:

All told, it cost about $40 in materials to put this together. I assembled the stir plate this weekend, and ran a test with about 1.5 L of water in my 2 L flask. The setup works pretty well, and I’ll be putting it into use for my next batch.

The finished stir plate