Vanilla Voay Porter

It is finally time for the first batch of the season! I’ve been wanting to do a vanilla porter for some time, because I have a bunch of vanilla beans from my last trip to Madagascar. My wife and I both like porters, too (and she loves vanilla porter), so the stars are in alignment for this attempt.

The base recipe is modified from one I found on-line; nothing too fancy, but that’s probably an OK thing. I had thought about riffing from the recipe for last year’s Schoolhouse Porter (which turned out awesome!), but the flavor for that would be just a little too big against vanilla. The hops are all whole hops from my dad’s vines in South Dakota, and I got all of the other ingredients at a new local homebrew shop (Vanguard Home Brewing Supply – much closer than the other options, and an excellent selection of malts, grains, and yeasts).

For those who are curious, “voay” (pronounced “voy”) is Malagasy for “crocodile.” The name was chosen because of the Malagasy origin of the vanilla, in honor of the various fossil crocs I’ve dug up over there, and because it has a nice ring to it!

Vanilla Voay Porter

  • 1/2 pound 40L caramel crystal malt
  • 1/2 pound chocolate malt
  • 1/2 pound cara-pils malt
  • 6 pounds light dry malt extract
  • 1 oz. Cascade hops (whole) for bittering
  • 1 oz. Sterling hops (whole) for bittering
  • 1 vial White Labs California V ale yeast (WLP051)

Steps

  • I heated 3 gallons of water to ~158°, and steeped the grains. After 30 minutes, I sparged them with 1 gallon of water, to fill the brew pot to 4 gallons.
  • I heated the water to boiling (gas stove now!), and turned off the flame. I added the dry malt extract, stirred it until it dissolved, and heated the pot to boiling.
  • Once the pot was boiling, I added the Cascade hops.
  • After 50 minutes, I added the Sterling hops.
  • After 60 minutes, I took out the hops, re-topped the kettle to ~4 gallons, and started cooling with my cooling coil.
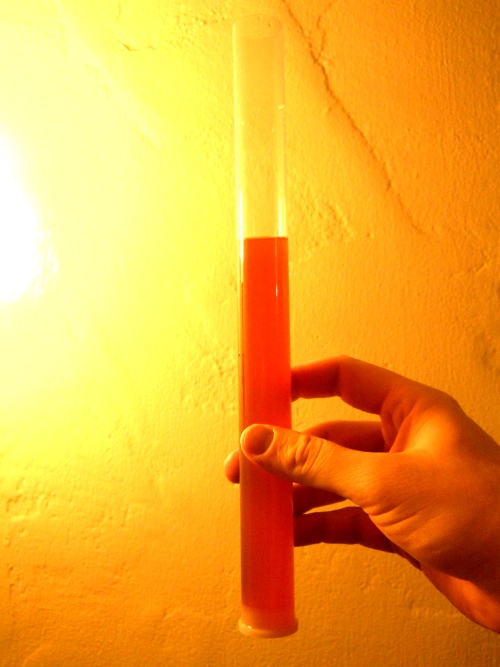
  • Once the wort had cooled to around 70°, I put it in the fermenter, topped to 5.5 gallons, and pitched the yeast. The starting gravity is 1.056 – I had started at 5 gallons, but the gravity was just a little too high (1.070).

Rainy Day IPA 1.1 Update

Tonight (7 January 2011, six days after brew day) I transferred my latest batch of the Rainy Day IPA to the secondary fermenter, a 6-gallon glass carboy. Right now, the s.g. reads at 1.018 (down from 1.060 at the beginning, for 5.5% alcohol by volume). Once the transfer was complete, I added 2 oz. of Cascade hops pellets (5.4% alpha acid) in a nylon mesh bag, for dry hopping.

The hops pellets were left over from last year (I bought them in March 2010), and were kept triple-bagged in the freezer. I’ve read that some deterioration is natural after opening (these were opened last year, as it was a 6 oz. bag), but that pellets are pretty hardy in the long-term because the interior is protected from oxygen.

In another minor technique change, I decanted the beer from the primary into the secondary fermenter through a hose attached to the spigot at the bottom of the primary, rather than through siphoning. I had been a little hesitant to try this, because I was worried about getting too much of the trub and other nastiness off of the bottom. But, it doesn’t seem like any more than normal got carried along (especially when I tipped the bucket back a bit for the initial part of the siphoning). I’ll definitely be trying this again, as it was much easier.

The beer is reasonably bitter, but not quite as much so as I remember from last time. The color and flavor is nice otherwise, so it will be interesting to see how the dry hopping augments the taste and aroma.

Rainy Day IPA 1.1

The Rainy Day IPA that I brewed last March turned out to be one of the best beers I’ve made yet. It had everything that a good IPA should have – clarity, lots of IBUs, and a good hoppy aroma. The use of pelletized hops for the dry hopping phase seemed to be the key to getting good hop aroma retention after bottling. Perhaps the increased surface area is behind this? In that case, I wonder if finely chopping up whole hops would have the same effect.

At any rate, I decided to make another batch of this, with just a few minor tweaks (primarily related to the ingredients I had on hand). Except as outlined below, everything is the same as before. So, I’ll only list the changes.

Differences From the Last Batch

  • More by accident than anything, I ended up steeping the grains at a slightly higher temperature (~170°) for the steeping phase.
  • I used 3 oz. of whole Cascade hops for the bittering (instead of a combo of whole hops and pellets added at various points during the boiling), boiled for the entire 60 minutes.
  • I added 1 tsp. of Irish moss at the 45 minute mark (done before, but not explicitly noted on the recipe).
  • I added 1 oz. of whole Sterling hops 57 minutes into the boil, and boiled these for 3 minutes, for aroma (instead of 1 oz. of Cascade pellets for 5 minutes).
  • After cooling with the cooling coil and topping up to 4.5 gallons, the starting gravity was 1.060 (on 1 January 2011). This contrasts with a starting gravity of 1.056 for the last batch.
  • I pitched the yeast, and it has been fermenting at 68°-72° degrees for the past few days.

I can’t wait to see how it will turn out, and if I can replicate the good points of the last batch. I plan to dry-hop it once again with some Cascade pellets left over from last year. They probably won’t be as fresh, but I do want to use them up.

Schoolhouse Porter

For the 2010-2011 brewing season, I decided to focus on porters (although I’ll certainly be brewing some other styles, too). So, it seemed appropriate to start off with a batch of just that, courtesy of a kit from Beer, Beer, and More Beer (there happens to be a store within a 45 minute drive of here). This is kit #168, which they title “Brown Porter.” I decided to jazz up the name a little.

Schoolhouse Porter

  • 7 lb. light malt liquid extract
  • 1 lb. English Brown malt
  • 1 lb. Crystal 40L malt
  • 1/2 lb. Chocolate malt
  • 1.5 oz. Vanguard hops (bittering)
  • 1 oz. Cascade hops (aroma)
  • 1 tablet Whirlfloc clarifier
  • 1 packet Safale S-04 dry yeast

Steps

  • I filled my brew pot with three gallons of water (tap temperature), added the malts, and turned on the heat. Following the directions, I left the grains in until the water reached 170 F. This took about 35 minutes. Then, I gently sparged them with about a quart of warm water.
  • I heated the water to boiling, turned off the heat (I’m using an electric stove), and stirred in the liquid malt. Then, I turned the heat back on.
  • Once the wort was boiling again, I added the 1.5 oz. of Vanguard hops.
  • After 55 minutes, I added the Whirlfloc clarifier. Apparently, this stuff is similar in function to Irish moss.
  • After another 4 minutes (59 minutes from the start of the boil), I added the Cascade hops.
  • After an additional one minute of boiling (for 60 minutes total boiling), I removed the pot from the heat and chilled it in an ice bath (my cooling coil was on loan).
  • While waiting for the wort to cool, I hydrated the yeast (as recommended in the directions) in one cup of water.
  • Once the wort had cooled sufficiently, I poured the wort into the fermenter, topped it up to five gallons, and pitched the yeast.
  • The starting gravity was 1.060 (with an estimated original gravity for the kit given as 1.046-1.052; not sure why I got such a high graviry). The wort had a wonderfully rich brown color.
  • This process was all started on 29 December 2010. Because I had to do another batch and only have one primary fermenter, I transferred it to a glass secondary fermenter on 1 January 2011. This was a little sooner than I wanted, but I had to brew while I had the opportunity. After these three days, the s.g. read as 1.026, suggesting ~4.5% alcohol by volume. The beer had maintained the nice brown hue, and also had a great chocolatey taste. I hope this is maintained after settling and bottling! The secondary fermenter continued to bubble steadily for two more days, so I suspect the gravity will drop a little more yet.

Experimental Golden Ale Bottled

Last night we bottled the Experimental Golden Ale. Final gravity was 1.012, for an estimated alcohol percentage of around 4.75 percent. The beer was a really nice and clear golden color, with the exact flavor (not too malty, not too hoppy) that I was hoping for. I primed the beer with 3/4 cup of corn sugar in one cup of water. Interestingly, the EGA foamed more than any other beer I’ve encountered previously while bottling. Don’t know why this was; I’m curious to see what this will look like when I crack open some of the carbonated bottles.

The final yield was 37 12-oz. bottles and 2 of the big 22-oz. bottles.