Lithographica Pilsner

Hobbies have a way of sneaking up on you. My homebrewing started in earnest nearly eight years ago, when I bought some basic equipment and ingredients for a red ale. For the next few years, things chugged along with various recipes–all extract-based, and some pretty decent. Then I moved into a larger place with a dedicated garage and utility sink, and before I knew it I was expanding to full volume boils and all-grain batches. Add in temperature-controlled fermentation and a kegging setup, and things have really taken a turn for the serious.

When I started brewing, each of those subsequent technique and equipment additions were unimaginable. I didn’t have space for many things, and it was taking a good bit of energy to keep on top of the very basics of sanitation, wort chilling, and bottling. Techniques like all-grain brewing seemed like way too much hassle for my time and available facilities. Then, I got practiced, and I got space. As the basics started to become second nature, they also got a little mundane. I wanted some spice in my brewing life, and suddenly all-grain brewing didn’t seem so intimidating after all. I added all-grain brewing to my tool-kit, and have spent more than two years learning and perfecting that. Many aspects of the process are second nature now…which means I’m in a headspace where I can think about adding even more tools to my brewing toolkit.

And here I am staring down at decoction mashing.

Pilsner Malt

Decoction mashing is a long, intimidating process, and quite frankly unnecessary in many cases. Yet, it is also a deeply traditional part of brewing, and for some malts and some recipes may indeed add a bit of flavor and body not possible with infusion mashes.

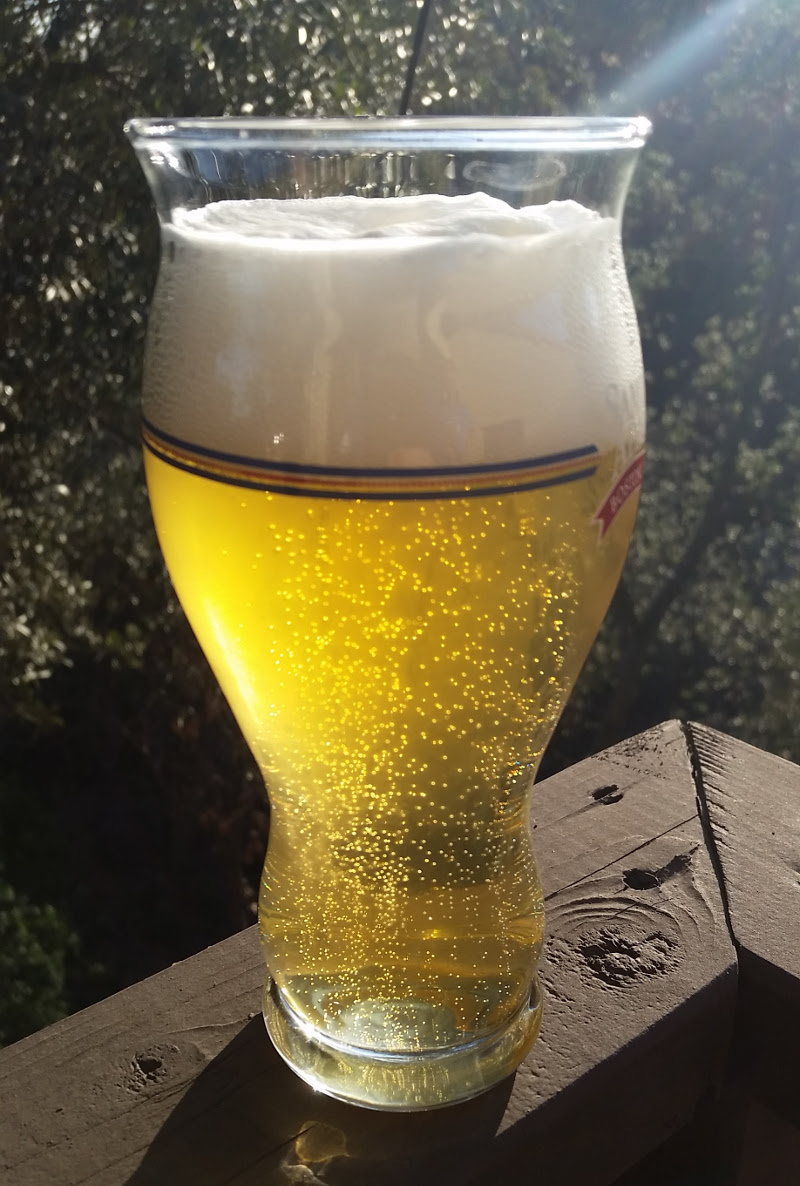
I recently decided to do another pilsner, and a Bohemian pilsner seemed like a good match. I researched and designed a recipe, aiming to incorporate authentic Bohemian ingredients wherever possible. It was quite a brew day–nearly eight hours–but worth the experience and hopefully worth the beer.

I chose the name “Lithographica Pilsner” owing to a special connection between paleontology and brewing; more on this in an upcoming post!

Lithographica Pilsner

  • 10 lbs. Floor-Malted Bohemian Pilsner malt (Weyermann)
  • 3 oz. Saaz whole hops (2.7% alpha), 60 minute boil
  • 1 oz. Saaz whole hops (2.7% alpha), 30 minute boil
  • 1 oz. Saaz whole hops (2.7% alpha), 10 minute boil
  • 1 oz. Saaz whole hops (2.7% alpha), 5 minute steep
  • Pilsner Lager Yeast (WLP800, White Labs), prepared in starter
  • 1 Whirlfloc tablet (10 minute boil)
  • 0.5 tsp. yeast nutrient (10 minute boil)

Saaz Hops

Procedure

    • Four days in advance, I prepared a 2.25L yeast starter, with 233 grams of dry malt extract. I ran it for two days until it fermented out, and then cold-crashed it until it could be decanted and pitched.
    • I used two 4.5 gallon volumes of water — 4.5 gallons for the mash, and 4.5 gallons for the sparge. Each 4.5 gallon measure started as distilled water, with 0.5 g of calcium chloride.
Mash during the acid rest.

Mash during the acid rest.

  • I added 11 quarts of water at room temperature, to hit the dough-in temperature of 72°. I let this sit for 30 minutes, before proceeding to the next step.
  • Next, I added 1.6 gallons of water at 176°, to hit the acid rest temperature of 105°. I let this sit for 10 minutes, and checked the pH. At room temperature, the pH was about 5.8, so it needed to come down slightly. I added phosphoric acid in two 5 mL increments and a final 10 mL dose (20 mL total), to hit a mash pH of 5.1. I remeasured again after 30 minutes, to see the pH had stabilized at 5.3. This mash at this point had a very milky color in the thin portion, likely due to the high amount of starch.
  • Next, I pulled a 1 gallon volume of thick decoction (most of the liquid drained off), and brought it up to 158° over 10 minutes. I let it sit for another 10 minutes, and then brought it up to a boil while stirring constantly. After a 5 minute boil, I added the decoction back to the mash. This raised the mash temperature to 122.4, a little below my target protein rest of 124°. Owing to this lower mash temperature (due to thermal loss in the mash tun), I increased the volume for the next decoction.
  • Decoction in ProgressI pulled another thick decoction (2 gallons), brought it up to 160°, let it sit for 10 minutes, and then brought it up to a boil. After 5 minutes of boiling, I added this back into the mash.
  • The mash temperature was raised up to 145°, well below my target mash temperature of 154°. So, I added 0.4 gallons of boiling water, which raised the mash temperature to 149°. I then added another 0.4 gallons of boiling water, to raise the mash to 152°. This happened over the course of 20 minutes.
  • After 1 hour, I did an iodine test, and saw full conversion.
  • I pull a third, thin decoction (basically, just mash runnings) of 4.5 quarts, and brought it to a boil for 5 minutes. I added this back to the mash, which raised it to 162°.
  • I stirred, let it sit, and pulled the first runnings. I then added 4.5 gallons of water at 180°, which brought the mash temperature to 170°. I let it sit for 10 minutes, vorlaufed, and collected the second runnings (a portion was left in the mash tun).
  • All told, I collected 7.6 gallons of wort with a preboil gravity of 1.042–84% mash efficiency!
  • After bringing the wort to a boil, I boiled for 90 minutes. Hops, Whirlfloc, and yeast nutrient were added per the schedule in the recipe.
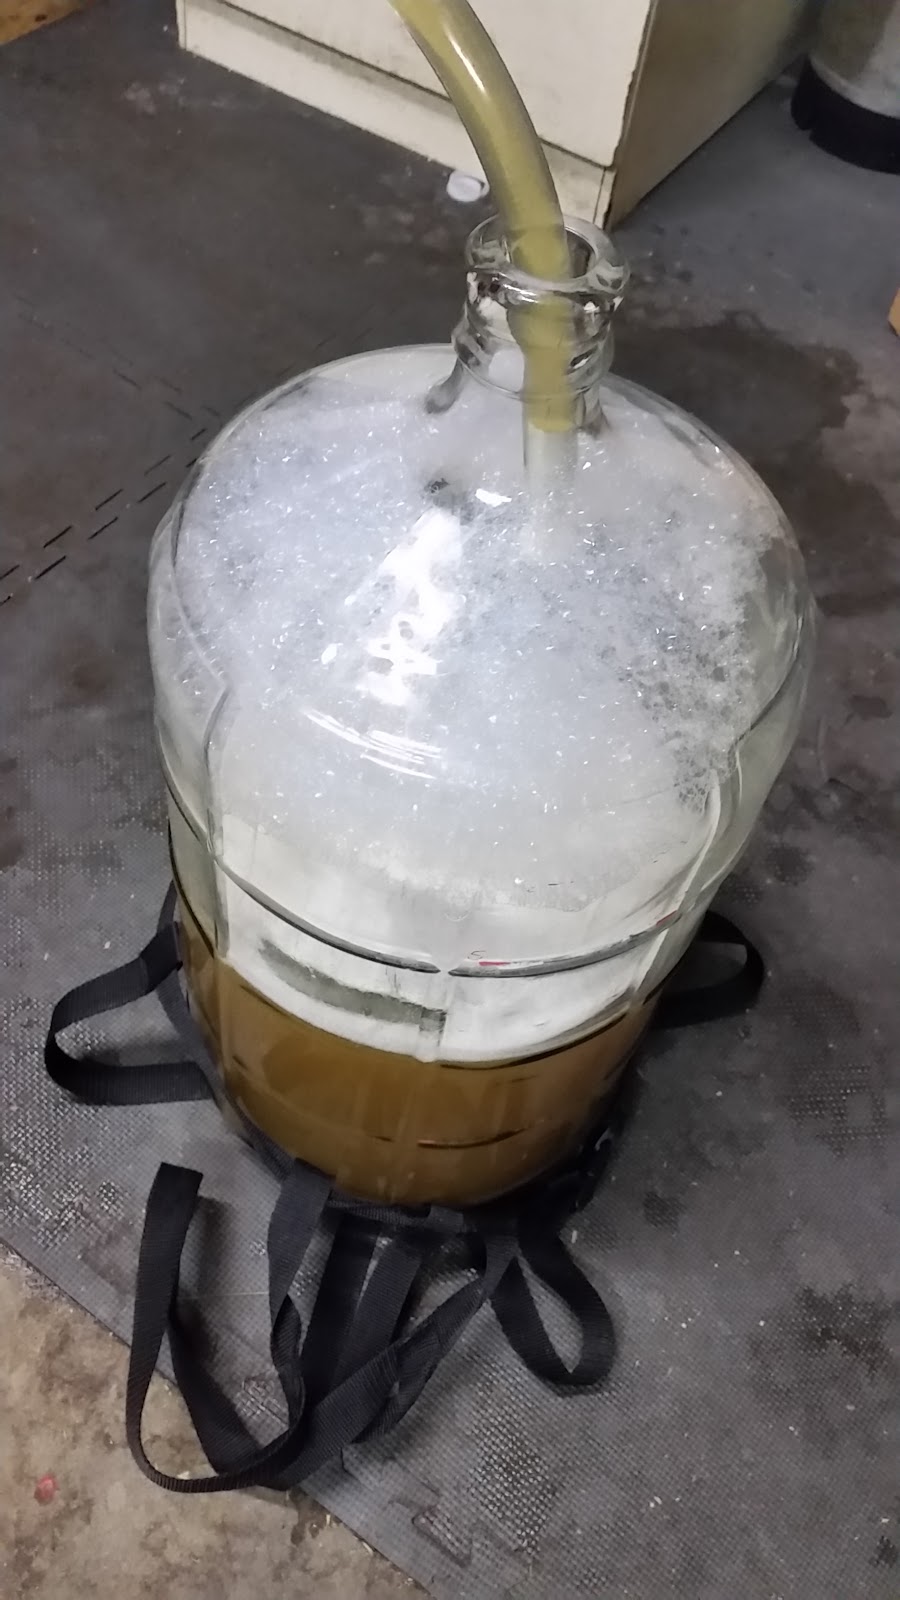
  • After the 90 minute boil, I added the final hop addition and chilled the wort down to 85°. My ground water is fairly warm now, and I had to chill the wort down to pitching temperature overnight anyhow, so I turned off the chiller and transferred the wort to my fermenter.
  • 5 gallons of wort went into the fermenter, with a starting gravity of 1.053.
  • I let the wort sit overnight in my fermentation chamber, to bring it down to pitching temperature. Due to the positioning of the temperature probe, the wort itself only got down to around 65°. It wasn’t ideal, but it was close enough to my pitching temperature (and I didn’t want to let the wort sit any longer). So, I pitched the yeast culture after decanting most of the spent wort. The wort was down to the target temperature within a few hours.
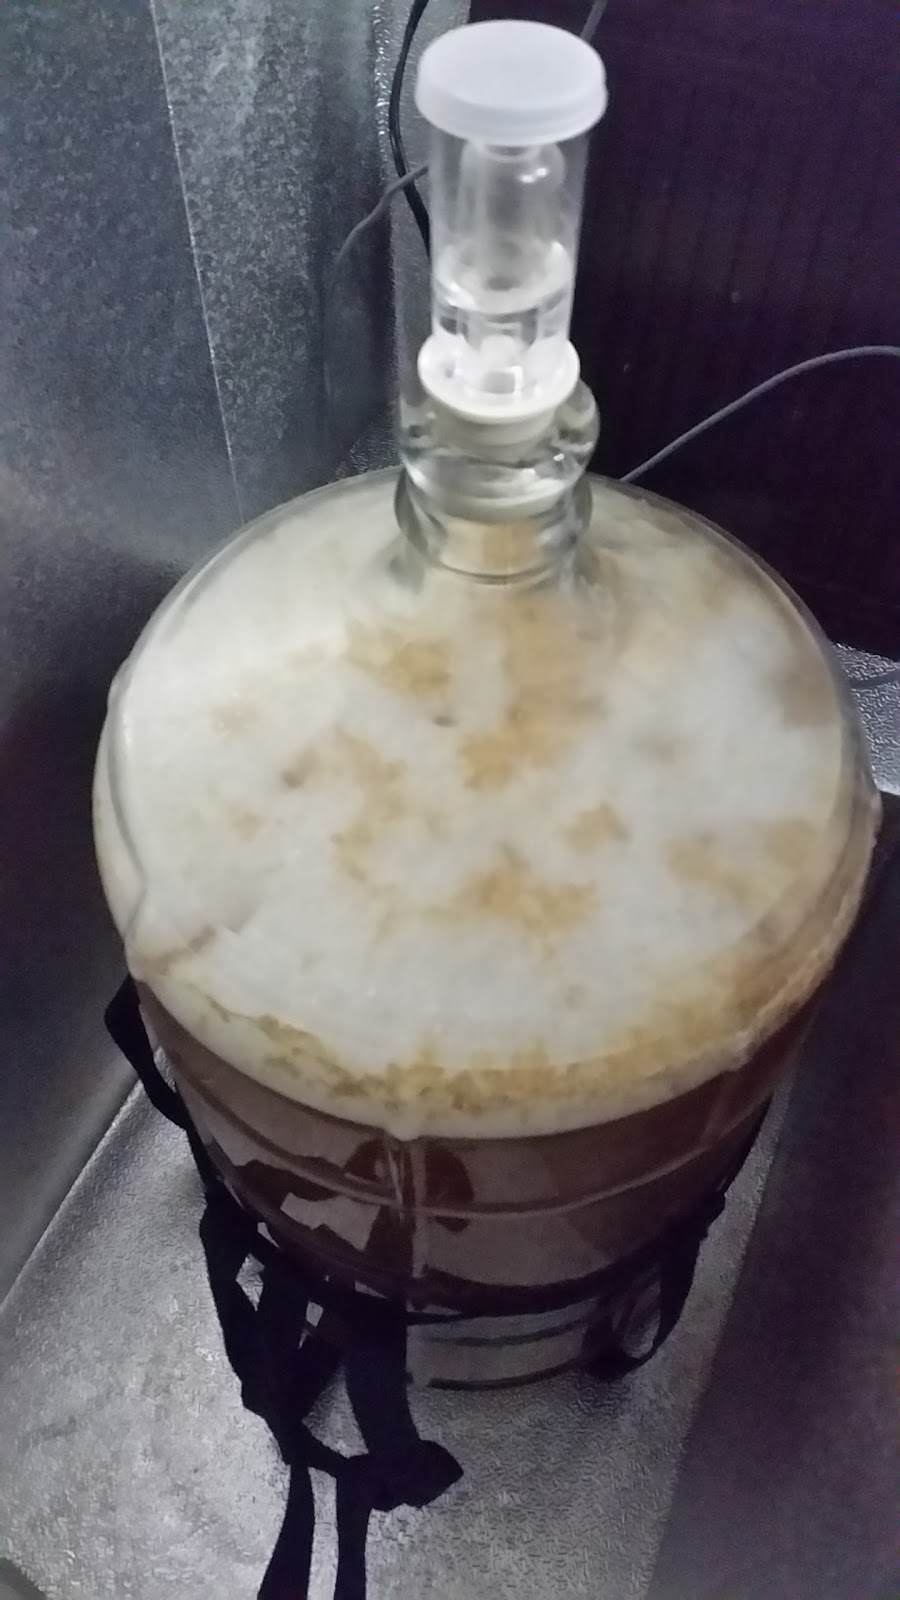
  • This beer was brewed on Thursday, June 2, 2016, and the yeast was pitched on the morning of Friday, June 3, 2016. Subtle signs of fermentation were visible by that evening, and a nice krausen had developed by the following morning (~24 hours later).
  • The fermentation chamber is set for 54°, and I’ll be following the Quick Lager schedule publicized by Brülosophy. At the moment, my plan is to:
    • Ferment at 54° for five days, and check the gravity. If I have passed 50% attenuation, I’ll move on to the next step.
    • Next, raise the temperature to 66° for a week or so.
    • Next, crash the temperature to 34°. When the temperature passes below 50°, I will add gelatin for fining.
    • After 48 hours, I will keg and carbonate, while lagering at around 34°.
  • When I checked the gravity on 7 June 2016, the beer was at 1.028, around 46% apparent attenuation. So, it needs to ferment out a few more days. The temperature was raised up to 66° on 11 June 2016.

What Did I Learn So Far?

  1. Decoction mashing is easier than I thought. This is not to say it is easy necessarily–it’s a lot of work, and adds time, but nothing about the process was really outside my comfort zone or ability. I won’t be doing it for every batch, but I’ll definitely be trying it again.
  2. Decoction mashing is a bit exhausting. It’s a lot of time stirring over a hot kettle, and you really do have to stir continuously. My arm was sore. But, it was worth it!
  3. Temperature targets are hard to hit exactly. I did find–as I had read elsewhere–that I ended up a few degrees shy of my targeted temperatures later in the process. This is probably due to thermal loss in the overall mash. So, I will have to adjust my calculations and take a larger decoction volume for each step. Lesson learned, and easy enough to incorporate next time I decoct!

Beer Tasting: Dad’s 3P

My first foray into a pilsner is nearing the end of its keg, so I wanted to make sure to get a tasting in before it was gone. I served it at a recent party, which depleted a good chunk of the supply, and gave away a few growlers, also. It’s not that I don’t like the beer–I do!–but I didn’t want to tie up too much equipment with something that required unique handling for serving temperature (cold, cold, cold) and carbonation pressure (high, high, high).

Dad’s Pre-Prohibition Pilsner

  • The Basics
    • Original gravity = 1.051; final gravity = 1.008; abv = 5.5%; estimated IBU = 30.
  • Aroma
    • This beer showcases a crisp and slightly spicy hoppiness, with a hint of corn sweetness behind that.
  • Appearance
    • Clarity is a touch off of the brilliant I was aiming for; there is a very faint chill haze, which is unfortunate (more on this later). The beer has an exceptionally tall and thick white head when poured, almost meringue-like in its texture and fineness. Retention is excellent; it sticks around as a full blanket over the beer until the very end. Despite the very minor chill haze, the effervescence of the beer gives a very nice visual too. The beer itself is a pale straw color.
  • Flavor
    • The flavor profile is quite clean, with crisp hops at the front and a clean but simple malt bill behind that. I definitely taste the corn backing up the rest of the beer, and perhaps a hint of the rye spiciness (although I don’t think I would pick it up if I didn’t know it was supposed to be there). It’s a reasonably bitter beer, but not overly so.
  • Mouthfeel
    • This is a light-bodied beer, with high carbonation (as appropriate for the style). The finish is dry, and very clean. A lingering but not overpowering hop bitterness rounds out each tasting.
  • Would I brew this again?
    • I feel like this is a very solid, but not perfect, first try at a pilsner. There’s a lot that hit the mark with this brew. The flavor and aroma are incredibly clean, without any DMS or diacetyl or fruitiness. It’s a tasty, easy-drinking beer, perfect for warmer weather. The color is a bit too light for the Classic American Pilsner style, and the slight haze is also an issue in terms of the strict style. That said, these don’t matter much for me in terms of taste enjoyment, although they are things I want to work out for the next batch of whatever pilsner I do.

      I think the haze in this case was compounded by two things. First, I added the gelatin to the keg, rather than the fermenter. I think next time I’ll add to the fermenter and let it work its magic in there for a few days before kegging. Second, I let the keg warm up a bit one night after serving, coupled with a bit of movement/sloshing, that probably didn’t help things either. So, I’ll aim to be a bit more careful with my handling next time, and see if that fixes things.

      For my next pilsner, I’ll probably go with something a little more “traditional”, just to see how that goes.

  • Overall
    • 6 / 10

3P Kegged

After 11 days at 65°, my pre-Prohibition pilsner is down to a final gravity of 1.008. This equates to 5.5% abv and 83% attenuation. The low mash temperature definitely did the trick for drying out the beer! On Saturday, January 30, I dropped the temperature down to 40°, and on Sunday dropped it again to 35°. This evening (Sunday, January 31), I kegged the beer. I am fining it with 3/4 tsp. of gelatin in 1/2 cup of water, mixed in with the beer. I’m force-carbonating and lagering at a temperature of 34°.

The beer has cleaned up pretty nicely, although is still pretty hazy. I expect the gelatin should take care of that in short order. I can definitely pick up the corn in the grist, as expected for a beer in the American pilsner style.

3P Update

I checked the gravity for Dad’s Pre-Prohibition Pilsner on Sunday, January 17. At this point, it was down to 1.018, from 1.051. This puts the beer at around 64% apparent attenuation (and 4.3% abv), so it’s time to start ramping up the temperature. The temperature at this point was around 52°. For the first 12 hours, I just let it free rise in the fermentation chamber. The next morning (January 18), it was at 55°. I then put my heating pad in the chamber, and set it at 60°. By that evening, it was at the desired temperature. I then gave it the final bump up to 65°, which it had reached by the morning of January 19.

Per the guidance from Brulosophy, I will leave it at this temperature for four to 10 days. I’ll probably do a check next weekend.

The beer is a quite pale straw color, and pretty hazy yet (not surprising). The krausen was ridiculously rocky on it–I suppose it’s a product of the grains plus the yeast strain. I am a bit surprised that I don’t pick up any really obvious off-flavors (e.g., diacetyl), but perhaps that is just my bad palate.

Dad’s 3P

For quite some time, I’ve been itching to make a lager. It was on my goal list for 2015, but never quite happened. The main thing deterring me was the time investment–the process takes longer than an average ale, so I didn’t want to tie up my fermentation chamber for months. I have to keep the taps on my keezer all occupied, after all!

When I discovered a “quick-lager” method, that provided the incentive I needed. This is a technique popularized by the folks at Brulosophy (although not developed by them, as they are quick to point out). Essentially, you use a temperature-change regimen to keep the process moving along. Most of the potential off-flavors are produced in the first half of fermentation, so once the beer is more 50% attenuated, you can raise the temperature and speed up the finishing. Then, it’s a cold crash, some gelatin, and you’re done!

For my first lager, I chose a recipe that my dad has been brewing for many years. It is a “Pre-Prohibition Pilsner,” in the style of the American beers that were made before Prohibition destroyed many of the traditional breweries and beers. He makes an extract version that is absolutely delicious, and has been brewing it in some form or another for close to 15 years. The original recipe came from the April 1999 issue of Brew Your Own, and I have modified it slightly for hop and yeast availability. The main changes are using Spalt instead of Tettnanger and WLP800 (Pilsner Lager) instead of an American pilsner strain.
I will note that the rye flakes are “off-style” for a classic American pilsner, and I suppose the yeast is too. But, it’s homebrew, so I’ll make my beer the way I want to and forget about official style guidelines. I also wanted to approximate the classic water of Pilsen, so used a water blend heavily tilted towards distilled water. Our tap water here has a ton of minerals, and so is not well-suited on its own for the styles (including American pilsners) that are best with soft water.
Dad’s 3P (Pre-Prohibition Pilsner)
  • 9 lbs. pilsner malt
  • 1 lb. flaked maize
  • 0.5 lb. carapils malt
  • 0.5 lb. flaked rye
  • 2 oz. German Spalt hops pellets (2.4% alpha, 4.3% beta), 60 minute boil
  • 1 oz. Hallertau hops pellets (2.7% alpha, 3.8% beta), 30 minute boil
  • 1 oz. Hallertau hops pellets (2.7% alpha, 3.8% beta), 15 minute boil
  • 1 tsp. Irish moss, 10 minute boil
  • 1 tsp. yeast nutrient
  • 1 package Pilsner Lager yeast (White Labs, WLP800), prepared in 2L starter
  • “Special water blend” – 2 gallons of the carbonate-heavy Claremont water with 7 gallons of distilled water.
Procedure
  • Five days in advance, I prepared a 2 liter yeast starter, and let it ferment out for 2.5 days (after the krausen had fallen). I then put it in the refrigerator to cold crash for another 3 days.
  • I mashed in with 4.25 gallons of water at 161.8°, aiming for a target mash temperature of 149°. The mash hit 149.8°, and was down to 146° after 55 minutes.
  • After the 60 minute mash rest, I added 0.84 gallons of water at ~160°, let it rest for 10 minutes, vorlaufed, and collected the first runnings. Then, I added 3.82 gallons of water at 180°, which brought the mash bed up to 162°. I let this rest for 10 minutes, vorlaufed, and drained again.
  • In total, I collected 7.75 gallons of wort with a gravity of 1.043, for an efficiency of 82%. I suspect my water volume must have gotten off somewhere in the process. But, I’m not too worried because this is my target gravity anyhow before the boil.
  • I brought the wort to a boil, and added the hops, Irish moss, and yeast nutrient per the schedule.
  • After 60 minutes of boiling, I chilled the wort to 74° using my wort chiller. Then, I transferred it with aeration and placed it in the fermentation chamber for 90 minutes to bring the wort down to 60°. At this point, it was pretty late, and I decided it would be okay to pitch the yeast. I saw evidence of fermentation (krausen starting to form, very slow bubbling in the airlock) when I checked on the beer around twelve hours later.
  • Starting gravity was 1.051. I’ll do the first stage of fermentation at 54°. I brewed this on 9 January 2016, and will check on the gravity in about a week, to see if it is ready to warm up.